Showing posts with label side. Show all posts

Saturday, November 23, 2013

Biscuits So Good Your Great Grandma Will Be Jealous


I am fortunate to have a history of long-living women in my family.  In fact, my Great Grandma passed away just a few years ago.  It makes me feel like time is on my side, you know?  I am also fortunate that I was able to experience her cooking.  You see, Flora came from a tiny town in the middle-of-nowhere Tennessee.  And as was the case with most southern women, she prided herself on her cooking.  And in her case, that pride was justified.  Her chicken and dumplings and chocolate pies are some best things I have ever eaten, and I have never ever tasted their equals.

Her biscuits were also amazing, but I am proud to say that not only have I equaled them, I am pretty sure I have surpassed them.  That probably has Flora squirming in the grave, but you know what?  She was also kind of a bitch, so....oh well.
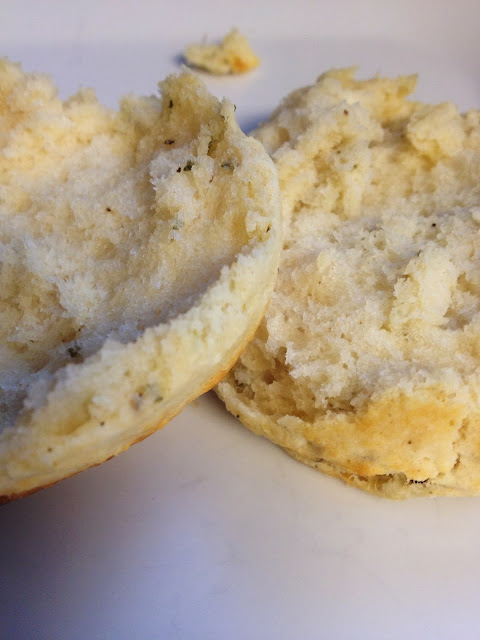


A few notes about biscuits...you have 3 options when it comes to fat: butter, shortening, and lard.  All butter...the taste is great, but in my esteemed biscuit opinion, the texture is off. They are too dense and heavy.  All shortening...the texture is perfect, but then the flavor suffers.  My resolution...lard, with a little butter too for the flavor.  If lard freaks you out, sub with shortening, but you really should give it a go.

Also...the less you handle the dough, the fluffier these will be.  After cutting the first time, I will re-form the dough and cut more, but these second-pass biscuits will not be quite as tender as the first.  And skip the third pass....those guys will be worthless.  Or you could just avoid this problem by going rogue and making square biscuits.  Also, make sure everything is really cold, it really does make a difference.

Sometimes I like to add in some flavor crystals, just to kick things up a notch.  In this case I added lots of cracked black pepper and fresh rosemary.  Other ideas are sliced green onions and cheddar cheese, blue cheese, lemon zest and thyme, or just plain old fashioned awesome biscuits.

Better Than Flora's Buttermilk Biscuits

2 cups flour (all-purpose or cake flour)
1 TB baking powder
1/4 tsp baking soda
1 tsp salt
3 TB lard
2 TB I salted butter (plus more to melt and brush on the top)
1 cup cold buttermilk

1.  Heat oven to 450.  Cut butter and lard into small chunks and put them in the freezer to make sure they are really really cold.  Combine the flour, baking powder, baking soda, and salt in a large mixing bowl.  Add butter and shortening, and using a fork and a knife, cut them into the flour until incorporated into the flour and the mixture looks like tiny crumbs or gravel.  Add buttermilk and stir until just combined.

2.  Turn the dough out onto a really well-floured surface and roll until about 1/2 - 1 inches thick, fold the dough in half on top of itself and press/roll it lightly so it sticks together.  This dough is going to be really sticky, so be generous with the flour.  Cut dough into rounds using a floured biscuit cutter or a glass (don't twist the cutter, push is straight down and pull it straight up).  Or use a sharp knife and cut the dough into squares.  Repeat if desired with any excess dough.

3.  Place biscuits onto ungreased baking sheet. Lightly brush the tops with melted butter.  Bake until the tops are golden brown, ~18 minutes.


Pin It

Wednesday, October 23, 2013

Kale and Sweet Potato Salad(?)


I never know what to call these things...I mean, it is mostly comprised of greens and there is a dressing, so I lean towards salad, but then it is warm and all cooked together...so sauté?  casserole?  Who knows?

Seriously...does anyone know?  Ugh, first-world problems.

 
Anyways, the idea for this dinner was lifted from my Family Circle magazine (yes, I am 80 years old).  I served it as a main dish for a vegetarian night, but it would be good as a side as well.  

And when you get your kale, please buy the bunches...don't get that bag of pre-chopped stuff, it makes it impossible to remove the tough ribs.

Kale and Sweet Potato Salad with Mustard Seed Dressing
Serves 4
200 cals / 5g fat / 39g carbs / 5g protein

1-2 bunches kale (depends on how much greenery you want)
2 sweet potatoes
1 apple
1 red onion
1 TB plus 1/2 tsp olive oil
2 TB mustard seeds
1/4 cup apple cider vinegar
2 TB sugar
salt and pepper to taste 

1. Combine 1 TB olive oil, apple cider vinegar, and sugar in a small saucepan.  Bring to a simmer, add the mustard seeds.  Simmer for 2 minutes, then set aside, allowing to steep for at least 10 minutes.

2.  Peel and chop the sweet potatoes into 1/2 to 1 inch cubes.  Heat 1/2 tsp olive oil in large sauté pan over medium heat, and cook sweet potatoes until softened, about 20 minutes.

3.  While potatoes are coking, remove the stems and center ribs from the kale leaves, tear or chop into bite-sized pieces.  Quarter and thinly slice the red onion.  Chop the apple into 1/2 inch pieces.  When potatoes are almost done (after 15-20 minutes) add the onion and apple, cooking until slightly softened, about 5 minutes.  Then add the kale and cook until softened and beginning to wilt. And sweet potatoes are totally cooked through, about 5 minutes more.  Toss with the prepared dressing and serve warm or at room temp.


Pin It

Wednesday, August 28, 2013

Sweet and Spicy Shrimp, a.k.a. The Best Shrimp You Will Ever Eat

I am a little weird/picky about shrimp.  I mean, I like it, but mostly when it is cold...and a little tougher, you know.....meat-like?  Warm shrimp usually freaks me out texture-wise and so I avoid it.  Except for this dish.

And truth be told, I have never met a soul who doesn't like this shrimp.  Even my pickiest little one (J, of course) will willingly eat this.


It is soooooooo great for a main dish, a side, or as an appetizer at a party.  And quick and easy.  What's not to love?

Sweet and Spicy Shrimp
Makes 6 servings
145 cals / 3g fat / 4g carbs / 24g protein

2 TB olive oil
1/4 cup brown sugar
1 lemon
1/2 cup fresh mint
1-2 tsp cayenne pepper (or to taste, depending on how spicy you like things)
1 tsp salt
1/2 tsp black pepper
2 lbs large shrimp, peeled, deveined, uncooked

1.  In the bowl of a food processor or blender, combine olive oil, brown sugar, zest and juice from one lemon, mint leaves, cayenne pepper, salt, and pepper.  Pulse until blended.  Rinse and dry shrimp and place in shallow dish or ziploc bag with sauce.  Allow to marinate at least 30 minutes, or overnight.

2.  Remove shrimp from marinade and cook over medium-high heat on the grill, about 2-3 minutes per side.  Or, alternatively, cook under high broiler until shrimp is done, about 3 minutes per side.  Serve warm or at room temp.  Garnish with fresh mint, if desired.


Pin It

Sunday, August 25, 2013

Cold Cucumber Soup

Ugh.  I have so many "summertime" recipe ideas to share and I am quickly running out of summer-time to share them.  But this is one I had to bump up to the top of the list.  


I am a big big fan of cold soups, and this one is probably my favorite.  It is full of garden-fresh goodness, takes all of 5 minutes to make, keeps well in the fridge, and is so so perfect for those steamy summer nights. 

Plus, at 30 cals per serving you can totally justify that milkshake you had B run out to get you at 9pm...or something like that.

Are you a cold soup fan?

Cold Cucumber Soup
Makes 8 servings
30 cals / 0g fat / 4g carbs / 3G protein

3-4 cucumbers
4-6 green onions
2 cloves garlic
1/3 cup fresh herbs plus a little extra for garnish, if desired (I like a mix of mint and parsley.  Cilantro, basil, and tarragon also work well)
1/2 lemon
1 cup vegetable broth
1 cup fat-free Greek yogurt
Salt and Pepper
Olive Oil for garnish, optional

1.  Peel and seed cucumbers.  Roughly chop.  Coarsely chop herbs and green parts of onions.

2.  Add chopped cucumber, green onion, chopped herbs, garlic cloves, juice from 1/2 lemon, and broth to blender or food processor and blend until smooth.  Add yogurt and purée until smooth and creamy.  Add salt and pepper to taste, blending to mix.  Refrigerate until cold, at least one hour and up to 3 days.  

Serve cold.  Garnish with extra chopped herbs and a few dots of olive oil, if desired.


Pin It

Monday, August 5, 2013

Jamaican Grilled Chicken and Plantains

This is one of my all time favorite summer meals, originating from the geniuses at Epicurious.


It is quick, easy, and delicious.  And who doesn't need another simple chicken recipe in their arsenal...right?

Also, my sister-in-law is from Jamaica.  And I made this for her once.  And she liked it...so it is at least a little bit authentic.

Jamaican Grilled Chicken and Plantains
Makes 6 Servings
455 cals / 6g fat / 68g carbs / 28g protein

1/4 cup molasses
1/4 cup red wine vinegar
2 TB tomato paste
1/2 small onion
3 cloves garlic
2 tsp fresh thyme leaves
1/2 tsp cayenne pepper (this will be spicy, add less if you don't want the heat)
1/2 tsp ground allspice
1/2 tsp salt
6 chicken breasts (about 1 1/2 lbs...mine comes with 3 in the pack and I slice them in half horizontally to get 6)
6 large plantains (make sure they are ripe...slightly soft and blackened peels)
1 TB olive oil
salt and pepper

1.  In a blender, combine the molasses, vinegar, tomato paste, onion, garlic, thyme, cayenne, allspice, and salt.  Process until smooth (I like to leave mine a little chunky, but it works both ways).

2.  Trim the chicken breasts, then season both sides with salt and pepper.  Place in a shallow dish and coat with enough sauce to coat.  You should have 1/2 to 1/3 of the sauce left over.  Let chicken sit at room temp to marinate for 20-30 minutes.

3.  Peel and slice the plantains on a diagonal about 1/2 inch thick.  Brush each side lightly with olive oil and season generously with salt and pepper.

4.  Grill chicken and plantains until done.  Chicken will take about 5-8 minutes per side and plantains will take about 3-6 minutes per side.  Serve with extra sauce on the side.


Pin It

Tuesday, July 30, 2013

Orzo Pasta Salad


This is my absolute favorite pasta salad.  I make it All.  The.  Time.  Seriously.  Like, I made it for New Years Eve. Who makes a cold pasta salad in the winter??  this girl. That's who. 

It is pretty basic, but I thought I would share so you too could become an obsessive pasta salad maker like myself.

Welcome to the club.

Orzo Pasta Salad
Makes 12 big servings
225 cals / 6g fat / 36g carbs / 8g protein

1 box orzo pasta (about 16 oz dry)
1/3 cup red wine vinegar
3 TB olive oil
3 TB sugar
1 1/2 tsp salt
1 tsp pepper
1 red onion
6-8 plum tomatoes
1-2 red peppers
1-2 seedless cucumbers
1/3 fresh dill (or mint)
8 oz crumbled reduced-fat feta cheese

1.  Cook pasta to al dente according to directions, then rinse with cold water to cool when done.

2.  While pasta is cooking, finely mince the garlic cloves, then whisk garlic, vinegar, oil, sugar, salt, and pepper together in a large bowl.  

3.  Finely dice the onion (hey...if onion taste bothers you, rinse the diced onion with cold water, it will remove a lot of the onion's power), seed and dice the tomatoes and pepper, dice the cucumbers, and chop the dill.  Toss together with the dressing, cooled pasta, and feta.
Pin It

Thursday, July 11, 2013

Confetti Quinoa

Hi.  I am interrupting my stream of summertime sweets to bring you this delightful salad.  Look at all that colorful delicious goodness.


I got the idea for this one from Pinterest....which is just a wealth of "pinspiration."  Especially for quinoa, which is so hot right now. This recipe comes from Whole Foods, which is another great source of inspiration for me. 

This makes a ton which is great because you can just keep it in your fridge and eat it all week.  Perfect for lunches, side dishes, snacks, or even as a quick meal.  And the great thing about this is you can easily adjust it to leave out things you don't like or swap for things you like.  And there is so much good-for-you stuff in this salad, it just makes sense to make this.


Confetti Quinoa Salad
Makes 12 servings
190 cals / 7g fat / 31g carbs / 6g protein

1 1/2 cups dry quinoa (I mixed red and white, any kind will work)
3 cups water
1 cup shelled edamame beans
1 cup shredded carrots
1/2 cup shredded coconut
1/2 cup dried cranberries
1 red onion
2 mangoes
1 red pepper
1/2 cup cilantro
1/2 cup slivered or sliced toasted almonds
3 limes
1/4 cup white balsamic vinegar
1 TB olive oil
1 1/2 tsp salt
1 tsp pepper

1.  In a large saucepan, bring the quinoa and water to boil over high heat, then cover and reduce heat to medium low.  Cook until water is absorbed and quinoa is done, about 15-20 minutes.  Set aside to cool.
2.  Meanwhile, dice the red onion, red pepper, mango, cilantro, and carrot shreds.   

3.  In a large bowl whisk together juice from the limes, olive oil, vinegar, salt and pepper.  Add the  quinoa, edamame, coconut, cranberries, almonds, onion, red pepper, mango, cilantro, and carrots.  Toss to combine and mix.  Serve chilled.

Pin It

Monday, June 24, 2013

Citrus Grilled Chicken with Citrus Rice Salad

Another day, another picnic-perfect summer meal.


Consider this for summer al fresco dinners, pot lucks, or picnics.  I am including directions for both the chicken and the rice, but you can easily make one without the other.

I made the salad with leftover grains I had in the pantry (quinoa, brown rice, wheat berries), but it would work with anything you have on hand.

As far as meal plans go for this week, I plan on spending lots of time at the pool (hopefully the weather agrees with me), so I don't have much of a meal plan.  We are having teriyaki steaks with sugar snap peas and rice, these Mediterranean Pizzas, and a big batch of this Quinoa Salad, which has quickly become my latest obsession.  I am keeping my summer meal plans laid back, just the way a summer vacation should be.

Citrus Grilled Chicken with Citrus Rice Salad
Makes 8 Servings
280 cals / 3g fat / /34g carbs / 34g protein

1/2 cup orange juice
1 TB olive oil
1/4 cup lemon juice
2 TB white wine vinegar
2 oranges (3 TB orange zest + the orange segments)
2 tsp salt
1 tsp pepper
1 bunch green onions
1 bunch mint, about 1/4 cup chopped
2 lbs chicken breasts
1 cup shredded carrot
1 red pepper
4 cups cooked rice (or any combination of grains)

1.  Trim all the fat and junk off the chicken and place in a large zip loc bag.

2.  Whisk together the orange juice, olive oil, lemon juice, vinegar, orange zest, salt, and pepper.  Thinly slice the green onions.  Add half the onions to the liquid and stir.  Reserve the rest for the rice.  Pour about half the marinade over the chicken, squeeze out any excess air, and seal tightly.  Allow chicken to marinate 2 - 24 hours.  Then grill chicken until done, about 4 minutes per side (may be longer depending on how thick your chicken is).  Thinly slice.

3.  Chop the mint and thinly slice the red pepper.  Cut the peel and pith from the oranges and cur out the segments.  Combine the remaining green onions, mint, orange segments red pepper, carrots, and rice together in a large bowl.  Add the remaining marinade and stir until well mixed.  Serve chicken over the rice salad, warm, at room temp, or cold.


And here it is, all packed up for a picnic at the zoo....

Pin It

Thursday, June 20, 2013

Curried Chicken Quinoa Salad

Mother Nature is being a serious B to those of us here int he Midwest.  Seriously.  It is the middle of June and it was 58 on Tuesday.  Fifty.  Eight.  Meanwhile it is over 80 in Alaska.  Ughhhhh. I never thought I would be jealous of Alaska weather.  This just isn't right.

On the plus side, it is cool enough to enjoy long mornings at the park with the kids, picnics in the afternoon, and evening bike rides.  As long as you have a jacket.  

Soooo, the next couple recipes I have to share is food I consider perfect picnic or potluck food.  In that you can make it ahead of time, and it is good served warm, room temp, or cold.  

This first one is my favorite.  I got the idea for this dish thanks to a couple of quickly ripening mangos in the fruit bowl, a tub of shredded chicken I the fridge I needed to use up, and L's constant request for tikka masala.  The result was deeeeeelicious.  This might be my favorite quinoa concoction ever.  Which is big.  I ate this right after I made it, warm, and loved it.  But then had it again the next day cold and thought it was even better.  The perfect picnic food!

Curried Chicken Quinoa Salad
Makes 8 servings
195 cals / 5g fat / 27g carbs / 9g protein

1 cup dry quinoa (I used a mix of red and white)
2 cups water
1/3 cup lemon juice (about 1 lemon)
1 TB honey
1 TB olive oil
2 tsp curry powder
1 tsp cumin
1 1/2 tsp salt
1 small red onion
1 bunch mint leaves (~1/4 cup chopped)
1 mango
2 cups cooked chicken breast

1.  Combine quinoa and water in saucepan over medium high heat.  Bring to boil, then cover, reduce heat to medium low and continue to simmer until quinoa is done and water is absorbed.  Set aside to cool.

2.  Mince onion and mint.  Dice mango and chicken.  Set aside.  

3.  In a large bowl, whisk together lemon juice, honey, oil, curry powder, cumin, and salt.  Add quinoa, chicken, mango, onion, and mint, tossing to coat.  

Enjoy!


Pin It

Thursday, June 13, 2013

Amazingly Easy Corn on the Cob, Perfect Every Time

Corn on the cob is one of my favorite things to eat in the summer.  It just tastes like summer to me.  I have tried it all different ways...boiled, baked or grilled.  But this way is by far my favorite.  Mostly because it is easy, fast, and impossible to mess up.  And there are no dishes to clean up.  Bonus!


I feel a little silly sharing this, as it isn't really a recipe.  But when I saw my friend Sean do this, my mind was completely blown.  He learned this method from some vendors at a farmers market.  And now I am passing it on to you.  Perfect and delicious corn on the cob in 4 minutes.  In the microwave.  ::dead::

Seriously. Is this news to you, or am I the only one who didn't know about this?

Amazingly Fast Corn on the Cob
ears of corn, shucked and cleaned
paper towels

1.  Get the paper towels wet then squeeze out the excess water.  They should be damp, but not dripping.  Wrap each ear of corn individually in a damp paper towel.  Microwave for 4 minutes.

That's it.  Now go amaze your friends.

Note:  If your corn is not quite ripe or you are microwaving several ears at once, you may need to add additional time.  Stick a fingernail in a kernel, if it is soft and just slightly crisp you are done.  If it is still crunchy-crisp, add some more time.  For example...yesterday I microwaved 5 not-quite-ripe ears at once.  After 4 minutes, they were still fairly crunchy.  I added 3 minutes, and they were not quite there.  1 more minute and they were perfect.


Pin It

Thursday, May 16, 2013

Crock Pot BBQ Pork Stuffed Sweet Potatoes with Slaw

Once upon a time, long long ago, B and I were on a date. I ordered steak. I think he might have been a little envious of my meal, a little food-possessive, or a little steak-curious. I don't know. But whatever the reason, something possessed him to think it was okay to slowly sneak his fork across the table and pierce one of my freshly cut bites of medium-rare perfection. And what was my reaction? I stabbed his hand. Hard. With my fork. It was an instantaneous reflex. Protect my steak at all costs.

The moral of the story? I take my meat seriously. And also, don't touch my food without asking. I will cut you.

While I wouldn't put BBQ on the same pedestal as steak, it is something I really love to eat. But I don't know how / possess the tools / really care to try to make a proper pulled pork the real way. So pulled pork at home was always just.....mehhhh (pork roast, crock pot, bottle of sauce, and cook, anyone?).

That is until I found this recipe. It totally rocked my crock-pot-pulled-pork world. It is pulled pork perfection. It is still simple enough for non-official BBQ lovers like myself to manage, but tastes authentic. And it smells so so SO good.

I replaced the bun with a healthier (and more filling) baked sweet potato. Top it with some slaw and you have yourself a perfect little dinner.

Slow Cooker BBQ Pulled Pork Stuffed Sweet Potatoes with Slaw
Makes 8 servings
310 cals / 9g fat / 29g carbs / 28g protein

2.5-3 lb lean pork roast (such as loin/sirloin)
2 tsp red wine vinegar
3 tsp hickory liquid smoke
2 tsp garlic powder
1 tsp salt
1/2 tsp pepper
3/4 cup of your favorite BBQ sauce

1 bag shredded cabbage/cole slaw mix
6 green onions
3 TB lite mayo
3 TB white wine vinegar
2 tsp sugar
1 tsp salt

4 large cooked sweet potatoes (I just cook mine in the microwave to save time)

1. Trim all the fat from the pork and place in crock pot. Sprinkle with garlic powder, salt, pepper, vinegar, and liquid smoke. Cook on high for 6-8 hours. Shred pork with 2 forks, stir in BBQ sauce (adjust amount to your preference. I like mine a little drier). Cook an additional 15 min or so.

2. In a large bowl, whisk together mayo, vinegar, sugar, and salt. Thinly slice green onions. Add onions and slaw mix to bowl and toss to coat. Let sit for ~20-30 min before serving.

3. Split baked sweet potatoes in half, top with BBQ pork and slaw, and serve.

Pin It

Wednesday, April 24, 2013

Back to Basics: Making Pasta

After my gluttony-filled mini vacation to San Francisco, one meal consisting of pappardelle pasta was on my brain (the ultra wide noodles).  But it is impossible to find pappardelle in the store.  And so, I was inspired to try my hand at making my own pasta.

I ordered a cheap pasta roller from amazon (this one).  And did some research.  I consulted with my friend and veteran pasta maker Anne.  And then I consulted the ultimate guide to how I do everything in my life (from how to make pasta to how to apply eyeliner), YouTube.  I found this video to be the most helpful:

http://youtu.be/twG7PCPDPEE


Plus I just love his accent. And his hat.  It makes me feel so authentic.

After several trials, I can now happily relay the following information:
  • Although time consuming, making pasta is actually easy and kind of fun....and therapeutic.
  • It is nearly impossible to screw pasta up.
    • Dough too dry?  Add a little water.
    • Dough too moist?  Add a little flour.
    • Egg Allergy?  Just use water and oil.
    • Don't have semolina flour?  All all-purpose works just great.
  • Homemade pasta is seriously the bomb.  
  • Listening to the classic Italian station on Pandora just helps.
Here is the recipe I like best:

Pasta Dough
Makes 6 large servings
465 cals / 6g fat / 80g carbs / 20g protein

4 cups all purpose flour
1 cup semolina flour
6 eggs
2 tsp olive oil

1.  Make sure your counter is clean and dry.  Mix the flours on the counter and shape into a large bowl/volcano shape (make the sides high enough to contain the eggs).  Crack the eggs into the well in the center.  Add the olive oil.  Using a fork whip the eggs and oil to blend, then slowly start mixing in some flour from the edges until egg mixture is thickened and slightly dough-ey.  If it is too dry and crumbly, add water by teaspoons until slightly moist and uniform.  If dough is too sticky, add more flour.

2.  Using your hands, continue mixing and kneading the dough until uniform.  Knead by hand for 10-15 minutes.  This is going to be tough.  The dough should be stiff, but not crumbly.  Put your back into it.  Break a sweat.  Knead knead knead. Frustrated? Angry? Take it out here.

3.  Wrap the dough in plastic and place in the fridge to rest for 30-60 minutes.  Do not skip this step.  It will help relax the gluten and make the dough nice and smooth and easier to work with.

4.  Remove dough from fridge and cut into 4 parts.  Work with 1 piece of dough at a time (keep the rest covered).  Sprinkle with flour, shape into a rectangle, and run through pasta roller at the widest setting.  Fold into thirds, pat with more flour to prevent sticking, and run through widest setting again.  Repeat 2-3 more times.  Turn dough to next widest setting and roll dough through, switch to next setting, roll dough through, repeating until dough is at desired thickness (I like setting "6").    

5.  Cut or shape dough into desired shapes.  Boil in salted water until done, about 3 minutes, and serve.

If you want to make the pasta ahead of time, you can dust noodles with flour and place in single layers on waxed paper.  These can sit out for 2-4 hours until you are ready to boil them.  It usually takes me ~45 minutes to roll and cut the pasta dough.


Here it is....homemade pappardelle with simple marinara sauce, some fresh basil, and parmesan.


Pin It

Tuesday, April 16, 2013

Parmesan Pea Risotto

Risotto is typically one of my "lack-of-planning" meals. It is simple to make, uses ingredients I almost always have on hand...arborio rice, broth, wine (duh), and totally works your arms with all the stirring involved (bonus). This is a basic recipe, but you can really add in any sort of flavors/add-ins you want.

The other plus? You can still fit this into a WW lifestyle, so says weight watchers since this recipe comes from there.  At only 395 calories for large serving (about a cup and a half), you can enjoy a creamy, filling rice meal without doing damage to your waistline.  Or if you need less of a calorie hit, serve a smaller portion with a big salad on the side.

Parmesan Pea Risotto
Makes 4 servings
395 cals / 8g fat / 66g carbs / 11g protein

2 tsp olive oil
1 small onion
3 cloves garlic
1 1/2 cup arborio rice
1 cup white wine
5 cups chicken broth
1/2 lemon (for juice)
1/3 cup parmesan cheese
2 TB butter
salt and pepper

1. Dice onion and mince garlic. Mix wine and broth together in a microwave safe bowl and heat until just beginning to boil, about 5-6 minutes (or heat in a saucepan). You will want to keep this hot, so keep running it in the microwave or keep it warm on the stove.

2. Heat oil over medium heat. Add onion and garlic and cook until translucent, about 5 minutes. Add rice and cook until coated and rice begins to turn clear, 3-5 minutes more. Increase heat to medium-high, add 1 cup of the hot broth/wine and stir occasionally until liquid is completely absorbed. Once absorbed, add 1/2 cup broth and stir until liquid is absorbed. Continue this pattern until rice is soft, but not mushy. This will take about 25-30 minutes.

3. Stir in peas and cook until done, 3-4 minutes. Stir in butter and parmesan, season with salt and pepper and serve.

Pin It

Friday, April 12, 2013

Breakfast Time: Healthier Banana Scones with Chocolate Rum Glaze


It has been a while since I have made scones. Luckily, the forces of the universe aligned, it was a gloomy slow morning, I needed something warm and sweet, and I happened to have a couple bananas sitting on my counter just begging to be used in something besides a smoothie.

These use less butter than my favorite recipe, but still bake up nice and flaky with the crunchy edges that make them so delicious. A few notes for these:
  • I used the same method as these if you need more instructions.
  • I used an equal mix of whole wheat and all purpose flours. You can use any type and ratio of flour you want.
  • These are easily adaptable, so you can sub in Earths Balance and Rice/Soy/Almond milk (for my soy-dairy-free friends).
  • The chocolate on top gives these just that hint of chocolatey awesomeness without impacting calories too much, but you can makes these healthier by skipping it, if you need to. You can also skip the rum if that isn't your thing.
  • You can also make/shape these then freeze them for storage. Bake them straight out of the freezer.
  • The dough is sticky. Don't be scared. Just be really generous with the flour when patting and shaping the dough.

Banana Scones with Chocolate Rum Glaze
Makes 12
145 cals / 4g fat / 22g carbs / 3g protein

3/4 cup milk
1 tsp apple cider vinegar (or lemon juice, or just 3/4 cup buttermilk)
1 cup whole wheat flour
1 cup all purpose flour
1/4 cup brown sugar
2 tsp baking powder
1/4 tsp salt
1/2 tsp cinnamon
4 TB cold cold butter
2 bananas
3 TB semi sweet chocolate chips
1 TB rum

1. Heat oven to 425. Spray a baking sheet with cooking spray and set aside. Mix milk with vinegar and set aside. Cut butter into small chunks. Peel and cut bananas into small chunks (about 1 1/2 - 2 cups).

2. In a large bowl, combine flour, sugar, baking powder, salt, and cinnamon. Use your finger tips to rub the butter into the flour mixture until it resembles a coarse meal (alternatively, you can do this part in a food processor). Add the milk and banana bits and stir until the dough is just barely combined.

3. Turn dough out onto a well-floured surface, and using floured hands, knead 2-3 times to bring it together. Shape and pat the dough into a rectangle, about 1-2 inches thick. Cut dough into 12 equal size pieces (circles, squares, triangles, wedges...whatever suits your fancy). Place on prepared sheet and bake until golden brown, about 25 minutes.

4. While scones are baking, combine rum and chocolate in a small bowl, then begin to heat for 20 second increments at half-power in the microwave, stirring in between increments, until melted and smooth. If your chocolate starts to seize, just add a tiny bit of butter to smooth it out. Drizzle over warm scones (I made a quick cone with waxed paper and piped it on for these). Serve warm.


Pin It

Wednesday, April 10, 2013

On the Side: Honey Dijon Roasted Sweet Potatoes

Here is a relatively easy side dish with a little twist, for those days you need to mix things up a little.  I feel like I often get stuck in a rut when it comes to vegetable sides...right now my obsession is apple cider glazed green beans, before this it was cooked carrots with dill. So I am always on the look out for something new to add into the rotation.

These sweet potatoes do just the trick.  A departure from my usual green beans or carrots.  Plus the addition of the mustard makes them a little different...but not different enough that they are hard to pair.  These go with just about everything.

Honey Dijon Roasted Sweet Potatoes
Makes 4 Servings
120 cals / 2g fat / 22g carbs / 1g protein 

3 large sweet potatoes
2 tsp olive oil
2 TB dijon mustard
2 TB honey
1 tsp salt
1 tsp pepper

1.  Heat oven to 425.  Spray a large rimmed baking sheet with cooking spray.  In a large bowl, whisk together olive oil, mustard, honey, salt, and pepper until smooth, set aside.

2.  Peel and dice potatoes into ~1/2 inch cubes.  Toss with mustard mixture to evenly coat.  Spread in an even layer on baking sheet.  Roast in oven until cooked through and beginning to brown, about 25-30 minutes, stirring half-way through.

Pin It

Friday, March 15, 2013

Family Dinner: Wheat Berry, Quinoa, and Squash Pilaf


I got the idea for this when I was discussing side dishes for a dinner my friend was making. We talked about some sort of grain thing....it gave me a craving, and so I came up with this. It was awesome.

We had it as our main dish with a green salad on the side, but I think this would work perfectly as a side dish as well. If you haven't added wheat berries to your whole grain menu, you should. They are similar to barley in texture...maybe a little nuttier/chewier. Because these are true whole grains, they are also a good source of fiber, protein, and B vitamins.

The wheat berries I bought were par-boiled so they cooked quickly, and at the same rate as the quinoa. Sometimes a plan just comes together perfectly.

Wheat Berry, Quinoa, and Squash Pilaf
Makes 6 Large Servings
370 cals / 12g fat / 57g carbs / 11g protein

1 small butternut squash
2 tsp olive oil, divided
1 cup wheat berries, dry
1 cup quinoa, dry (I used red)
1 onion
4 cloves garlic
1/2 cup dried cranberries
1/2 cup pecan chips
1 TB rosemary (2-3 sprigs)
1/4 tsp coriander
1/4 tsp cardamom
Salt and pepper
5 cups chicken or vegetable broth
6 TB crumbled goat cheese

1. Spray a baking sheet with cooking spray. Heat oven to 400. Peel and cut butternut squash into 1/2 inch cubes. Toss with 1 tsp olive oil and season with salt and pepper. Spread in even layer on baking sheet and roast until cooked through and beginning to brown, stirring about half-way through. About 25-30 minutes.

2. While squash is cooking, dice onion and mince garlic and rosemary. Heat remaining 1 tsp oil in a large pot over medium heat. Add onions, garlic, and rosemary and cook until onions are soft and translucent, about 10 minutes. Stir in pecans, wheat berries, and quinoa, and stir until begging to become toasted, about 3-5 minutes. Stir in cranberries, coriander and cardamom, then stir in broth. Bring to a boil, then reduce heat to medium-low, cover, and let simmer until wheat berries and quinoa are done, about 15 minutes.

3. Fold in roasted squash, season with salt and pepper, and serve. Top each serving with ~1 TB goat cheese crumbles.


Pin It

Wednesday, February 20, 2013

On the Side: Apple and Carrot Salad

I love this salad.  The matchsticks are a pain to cut, but it is worth it.  I based this salad on one I had with B at Spago....of course that one came with some house burrata and prosciutto...but I work with what I have.


Apple and Carrot Salad
Makes 8 Servings
65 cals / 1g fat / 15g carbs / 1g protein

2 granny smith apples
2 sweet apples (gala, honey crisp, fuji, etc...)
2 cups shredded carrots (save yourself time and buy the bag of pre-shredded)
Juice from 1 lemon
2 tsp olive oil
1 bunch chives (about 1/4 cup minced)
1 TB sugar
1 tsp salt
1/2 tsp pepper

1.  In a large bowl, mix the lemon juice with the olive oil, sugar, salt, and pepper.  Mince the chives (about 1/4 cup worth) and stir into the dressing.

2.  Cut the apples into matchsticks and toss the match sticks with the dressing (I slice off 4 sides of the apple to slightly square it and throw out those slices...they will be mostly peel.  Then I thinly slice each of the 4 sides of the apple until I get to the core.  Then slice those into matchstick shapes).  Add the carrot shreds and toss all together to mix well.

Pin It

Tuesday, February 12, 2013

Love Is: Sweet and Spicy Bacon

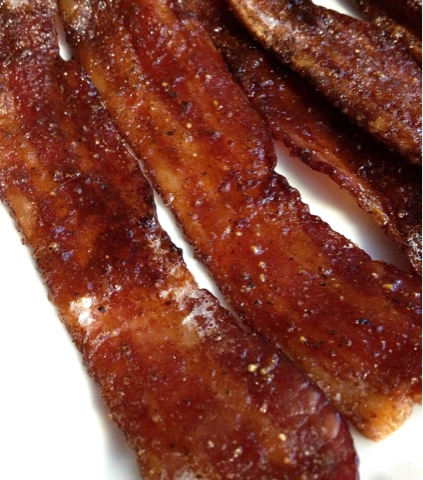
In honor of Valentine's Day and all things love and romance, I thought I would share this recipe for the best bacon you will ever eat.  Seriously.  The.Best.Ever.


If you are in need of a last minute gift to really impress that special someone, skip the flowers and candy and go with what they really want.....bacon.  Salty, spicy, sweet, crisp, chewy, delicious bacon.

You can't go wrong here, I promise.  Unless your special someone is Muslim.  In that case, bacon would be very wrong.

Sweet and Spicy Bacon

1 pack thick-cut bacon (1lb)
3 TB brown sugar
1/3 tsp cayenne pepper
1/3 tsp black pepper

1.  Heat oven to 375.  Lay bacon slices out evenly over a broiler pan or wire rack set over a rimmed baking sheet (has to be this way so the fat drains off and the sugar caramelizes and crisps up.  Don't just lay it on a flat sheet).  Mix sugar, cayenne, and pepper together,  set aside.

2.  Cook bacon for ~20 minutes.  Remove from oven and sprinkle 1/3 sugar mixture over each slice.  Turn each slice of bacon over and sprinkle evenly with remaing sugar mix, spreading with the back of a spoon if needed.  Return to oven and cook until bacon is crisp and done, about 20-25 min more.  Serve warm or at room temp.


Starting off and half-way done.

If you want to be really crafty, cut each raw bacon slice in half, then fold the halves onto each other to form a heart shape before baking.


Pin It

Wednesday, December 12, 2012

Family Dinner: Porkchops and Applesauce


This post is brought to at the request of the husband.  I wish I could say it was the pork chop, but I really think it is the applesauce that gets him excited.  And I can't say I disagree with him.  Yes, you can buy applesauce from the store, but the kind on your stove, all sweet and warm with homemadey (this should be a word) flavor really hits it out of the park.  And what better to serve alongside the sauce than some oven baked pork chops?

A simple dinner you can't go wrong with. I start my applesauce (and in this case, some carrots), then make the chops.  Walla, everything gets done about the same time.

Stove Top Applesauce
Makes 4 servings
105 cals / 0g fat / 29g carbs / 0g protein

2 softer sweet apples (such as gala)
2 granny smith apples
2 TB brown sugar
1/4 tsp cinnamon
1/2 cup water
Pinch of salt

1. Peel, core, and chop your apples. You will want to cut the granny smiths into smaller pieces than your sweet variety because it will take longer for these to break down (roughly 1/2 to 1/3 the size).

2. Place the cut apples in a saucepan over medium heat and stir in sugar, water, cinnamon, and salt.

3. Continue to cook, stirring occasionally until most pieces are broken down and it is at your desired consistency, adding more water if needed. I cook mine for about 30 minutes. Keep warm until ready to serve.


Oven Baked Pork Chops
Makes 8 Servings
150 cals / 2g fat / 9g carbs / 19g protein

1 pack of 8 thin pork loin chops (~1.5 lbs)
1/2 cup breadcrumbs
1/2 cup panko
1 tsp garlic powder
1/2 tsp onion powder
1/2 tsp paprika
Pinch of cayenne pepper
2 egg whites
3 TB water
Salt and Pepper and Cooking Spray

1. Pre-heat the oven to 425. Cut that ribbon of fat off of the pork chops (and any other visible fat) and generously season them with salt and pepper.

2. Onto a plate or shallow dish, mix the breadcrumbs, panko, garlic powder, onion powder, paprika, and cayenne. In a separate bowl, beat the egg whites and water together with a fork until frothy.

3. Generously spray a baking sheet with cooking spray. Dip each chop in the egg whites, then dredge in breadcrumb mix to coat. Place each on the prepared sheet and lightly spray the tops with cooking spray.

4. Bake for 25 minutes, flipping the chops over half-way through cooking.


Pin It

Monday, November 5, 2012

Quick Fix: Roasted Brussels Sprouts with Balsamic Glaze

I absolutely love roasted brussels sprouts. Beyond the fact that they are so stinkin' cute...throw them in the oven and they turn into perfect little green and brown balls of deliciousness.

This is my hands-down favorite way to make them. It it so good that it even had my father-in-law, a lifelong sprout hater, going back for seconds. I made him try one to start with (house rules, yo! everyone has to try at least one bite before they can say they don't like it).

Roasted Brussels Sprouts with Maple Balsamic Glaze
Makes 8 Servings
85 cals / 3g fat / 12g carbs / 4g protein

2lbs Brussels sprouts, washed, with stems trimmed off and any gross leaves removed, cut in half
2 TB olive oil
2 tsp kosher salt, plus a pinch extra
1 tsp cracked black pepper
3 TB balsamic vinegar
2 TB pure maple syrup

Heat oven to 450. Toss sprouts with olive oil, salt, and pepper to coat. Spread out in an even layer on a large baking sheet. Cook in oven for about 30 min, stirring half way, until browned in spots and around edges.

While sprouts are roasting, bring maple syrup, vinegar, and a pinch of salt to a boil in a small saucepan over medium heat, swirling occasionally until reduced to a thick syrup. Drizzle over sprouts and toss before serving.
Pin It