Saturday, June 29, 2013

Simply Amazing One-Pot Pasta


As soon as I saw this recipe in my Martha Stewart magazine, I knew I would be testing it out.  I mean...pasta, cooked in cold water....who ever heard of such a thing??  Insanity.  But just the kind of thing that appeals to my lazy laid-back approach to life.

This dish really is amazing....so simple, quite tasty, and so SO fast.  The starch and the water cook down together to make a creamy sauce, almost like a risotto...but with pasta instead.  Crazy, right?  And even better....I kid you not, this was ready in under 15 minutes from start to finish.  15 minutes and dinner is on the table.  Everybody needs a dish like this in their arsenal.

One-Pot Pasta
Makes 6 servings
290 cals / 5g fat / 44g carbs / 13g protein

14 oz dried spaghetti (one box)
1 pint cherry tomatoes
1 small onion
4 cloves garlic
1/4 cup fresh basil
1 TB olive oil
1/2 tsp crushed red pepper
1 tsp oregano
2 tsp salt
1/4 tsp black pepper
4 1/2 cups water

1. Place dried pasta in a large skillet/pan.  Quarter the tomatoes and add to pan.  Peel and cut the onion in half, then thinly slice, then add to pan.  Thinly slice the garlic and place in pan.  Tear the basil and add to the pasta.  Add the olive oil, red pepper, oregano, pepper, and salt.  Pour the water over the pasta.

2.  Turn the heat to medium-high.  Bring the water to a boil and continue to cook until the liquid is absorbed and pasta is al dente, about 9 minutes.  While the pasta is cooking, use tongs to toss pasta and veggies frequently to distribute everything and make sure it all cooks evenly.  If your heat is too high, the water may cook out before the pasta is done.  Just add a little more and cook until it is ready...I ended up adding about 1/4 cup more water to mine.

And voila....garnish with some parmesan and serve.  That Martha, man....she's a genius.


Pin It

Wednesday, June 26, 2013

Things I'm Loving Lately....


This ranch dressing.  Finally a healthy low-fat, low-cal ranch that actually tastes good.  I can't wait to try other varieties....


Sassy poses for the camera....


How great these bug cakes turned out for my niece and nephew...


Long, lazy days at the pool....


Breakfast with the sheriff...


Movie dates with the munchkins...


And basically all the wonderful things I've got going on right now.  Sometimes it feels good to focus on the good things....
Pin It

Monday, June 24, 2013

Citrus Grilled Chicken with Citrus Rice Salad

Another day, another picnic-perfect summer meal.


Consider this for summer al fresco dinners, pot lucks, or picnics.  I am including directions for both the chicken and the rice, but you can easily make one without the other.

I made the salad with leftover grains I had in the pantry (quinoa, brown rice, wheat berries), but it would work with anything you have on hand.

As far as meal plans go for this week, I plan on spending lots of time at the pool (hopefully the weather agrees with me), so I don't have much of a meal plan.  We are having teriyaki steaks with sugar snap peas and rice, these Mediterranean Pizzas, and a big batch of this Quinoa Salad, which has quickly become my latest obsession.  I am keeping my summer meal plans laid back, just the way a summer vacation should be.

Citrus Grilled Chicken with Citrus Rice Salad
Makes 8 Servings
280 cals / 3g fat / /34g carbs / 34g protein

1/2 cup orange juice
1 TB olive oil
1/4 cup lemon juice
2 TB white wine vinegar
2 oranges (3 TB orange zest + the orange segments)
2 tsp salt
1 tsp pepper
1 bunch green onions
1 bunch mint, about 1/4 cup chopped
2 lbs chicken breasts
1 cup shredded carrot
1 red pepper
4 cups cooked rice (or any combination of grains)

1.  Trim all the fat and junk off the chicken and place in a large zip loc bag.

2.  Whisk together the orange juice, olive oil, lemon juice, vinegar, orange zest, salt, and pepper.  Thinly slice the green onions.  Add half the onions to the liquid and stir.  Reserve the rest for the rice.  Pour about half the marinade over the chicken, squeeze out any excess air, and seal tightly.  Allow chicken to marinate 2 - 24 hours.  Then grill chicken until done, about 4 minutes per side (may be longer depending on how thick your chicken is).  Thinly slice.

3.  Chop the mint and thinly slice the red pepper.  Cut the peel and pith from the oranges and cur out the segments.  Combine the remaining green onions, mint, orange segments red pepper, carrots, and rice together in a large bowl.  Add the remaining marinade and stir until well mixed.  Serve chicken over the rice salad, warm, at room temp, or cold.


And here it is, all packed up for a picnic at the zoo....

Pin It

Thursday, June 20, 2013

Curried Chicken Quinoa Salad

Mother Nature is being a serious B to those of us here int he Midwest.  Seriously.  It is the middle of June and it was 58 on Tuesday.  Fifty.  Eight.  Meanwhile it is over 80 in Alaska.  Ughhhhh. I never thought I would be jealous of Alaska weather.  This just isn't right.

On the plus side, it is cool enough to enjoy long mornings at the park with the kids, picnics in the afternoon, and evening bike rides.  As long as you have a jacket.  

Soooo, the next couple recipes I have to share is food I consider perfect picnic or potluck food.  In that you can make it ahead of time, and it is good served warm, room temp, or cold.  

This first one is my favorite.  I got the idea for this dish thanks to a couple of quickly ripening mangos in the fruit bowl, a tub of shredded chicken I the fridge I needed to use up, and L's constant request for tikka masala.  The result was deeeeeelicious.  This might be my favorite quinoa concoction ever.  Which is big.  I ate this right after I made it, warm, and loved it.  But then had it again the next day cold and thought it was even better.  The perfect picnic food!

Curried Chicken Quinoa Salad
Makes 8 servings
195 cals / 5g fat / 27g carbs / 9g protein

1 cup dry quinoa (I used a mix of red and white)
2 cups water
1/3 cup lemon juice (about 1 lemon)
1 TB honey
1 TB olive oil
2 tsp curry powder
1 tsp cumin
1 1/2 tsp salt
1 small red onion
1 bunch mint leaves (~1/4 cup chopped)
1 mango
2 cups cooked chicken breast

1.  Combine quinoa and water in saucepan over medium high heat.  Bring to boil, then cover, reduce heat to medium low and continue to simmer until quinoa is done and water is absorbed.  Set aside to cool.

2.  Mince onion and mint.  Dice mango and chicken.  Set aside.  

3.  In a large bowl, whisk together lemon juice, honey, oil, curry powder, cumin, and salt.  Add quinoa, chicken, mango, onion, and mint, tossing to coat.  

Enjoy!


Pin It

Saturday, June 15, 2013

Banana Layer Cake with Salted Caramel Buttercream Filling, Sour Cream Frosting, and Salty Roasted Pecans


Whew.  That title is quite the mouthful.  Kind of like this cake.  There is a lot going on here.  But every bit of it is delicious and each part goes so well together.

I made this for B for his birthday last month.  He wanted banana cake.  I took his request and ran.  This one was definitely a winner.  The salty pecans and the sour cream frosting balance out the rich sweetness of the cake and the caramel filling.  This takes a lot of work to make, but it is worth it.  

Make sure you have plenty of people to share this with.


Banana Layer Cake
Makes 3 8-inch layers

2 1/2 cups cake flour
2 1/2 tsp baking powder
1/2 tsp baking soda
1/2 tsp salt
1/2 cup butter, at room temp
1 1/2 cup sugar
2 eggs, at room temp
1 tsp vanilla extract
1 cup puréed/mashed bananas (about 3-4 bananas)
1/4 cup buttermilk

1.  Heat oven to 350.  Grease and flour 3 8-inch pans.

2.  In a medium size bowl, mix together flour, baking powder, baking soda, and salt.  Set aside.  Mix buttermilk and banana together in a separate small bowl.  Set aside.

3. In a large bowl, beat the butter and sugar together with an electric mixer until light and creamy, about 5 minutes.  Beat in the eggs one at a time.  Add vanilla and continue to mix until incorporated, about 30 seconds more.

4.  Add 1/3 flour mixture to butter and bet until just incorporated.  Add 1/2 milk mixture and mix until just barely mixed.  Add 1/2 remaining flour and again beat until just mixed.  Add remaining milk, mix until just barely incorporated, then add the rest of the four and mix until just barely mixed.

5.  Divide batter between the 3 pans.  Bake until a toothpick comes out clean, about 25-30 minutes.  Allow to cool in the pans then loosen edges with a knife before turning cakes out.  Wrap tightly in plastic wrap until ready to assemble.  Can be made up to 1 day ahead of time.


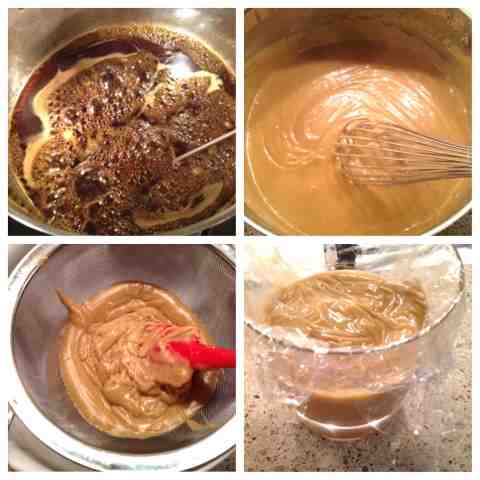
Salted Caramel Italian Meringue Buttercream
Makes ~ 3 cups

1/2 cup caramel sauce (I used this recipe, you can make your own or buy it)
3 egg whites
1/4 cup water
1 cup sugar
1 tsp light corn syrup
1/2 tsp salt (or more to taste)
3/4 lb butter, cut into tablespoon sized chunks

1.  Combine the sugar, water, and corn syrup in a heavy-bottomed pan.  Put egg whites in clean bowl of a stand mixer fitted with a whisk.  Begin beating egg whites on medium speed.  While eggs are whipping, turn heat on sugar mixture to medium and cook without stirring, heating to 240 degrees.  Once the sugar reaches 240, your egg whites should be in stiff peaks, if it is taking longer for the sugar to heat, slow the mixer down so the egg whites don't break.  This should take about 6-8 minutes.

2.  When the sugar reaches 240, remove from heat.  Turn the mixer to medium-high and pour the sugar syrup very slowly in a thin stream down the side of the bowl.  Continue to mix until egg whites are cool/room temperature.  About 10 minutes.

3.  Lower the speed to medium low and begin adding the butter, 1 TB at a time, making sure each piece in fully incorporated before adding the next. If your frosting breaks apart or curdles, don't worry, just keep mixing and adding butter, it will come together and form a fluffy creamy frosting.  When all the butter has been added and the frosting has turned smooth and fluffy, slowly add the caramel sauce in a thin stream.  Allow to mix for 1 more minute.  Keep at room temp until ready to use.  Or you can make this up to 1 week ahead of time and store in the fridge.  Allow to come to room temp and whip for 2-3 minutes prior to using. 


Sour Cream Frosting
Makes ~3 cups

1 cup butter, at room temp
4 oz sour cream
1 tsp vanilla
1 1/2 - 2 lbs powdered sugar
2 TB milk

1.  In a stand mixer fitted with the paddle, cream the butter, sour cream, and vanilla until smooth.  Add the powdered sugar, and continue to beat on medium speed until frosting is smooth and creamy.  Beat in milk, if needed, to make frosting at desired consistency.  Can be made up to 1 week ahead of time.  Store in fridge.  Allow to come to room temp before using, whipping if needed.

Salty Roasted Pecans

1 cup crushed pecans
2 TB melted butter
1 tsp salt

1.  Heat oven to 350.  Toss pecans with butter and salt to coat, then spread in an even layer on a baking sheet.  Cook until oven until toasted and brown, about 10 minutes.  Allow to cool to room temperature.  Can be made up to 1 week ahead.  Store at room temp in an air tight container.

Assembly:

1.  Cut tops of each cake layer to level.  Place one layer cut-side up on a cake plate or board.  Spread with ~1 cup caramel frosting.  Top with another layer of cake and then another ~1 cup caramel frosting.  Top with last layer of cake, cut-side down, and gently press to adhere.  Cover with sour cream frosting.  Gently press roasted pecans into sides of the cake to cover.  Chill until ready to serve.


Pin It

Thursday, June 13, 2013

Amazingly Easy Corn on the Cob, Perfect Every Time

Corn on the cob is one of my favorite things to eat in the summer.  It just tastes like summer to me.  I have tried it all different ways...boiled, baked or grilled.  But this way is by far my favorite.  Mostly because it is easy, fast, and impossible to mess up.  And there are no dishes to clean up.  Bonus!


I feel a little silly sharing this, as it isn't really a recipe.  But when I saw my friend Sean do this, my mind was completely blown.  He learned this method from some vendors at a farmers market.  And now I am passing it on to you.  Perfect and delicious corn on the cob in 4 minutes.  In the microwave.  ::dead::

Seriously. Is this news to you, or am I the only one who didn't know about this?

Amazingly Fast Corn on the Cob
ears of corn, shucked and cleaned
paper towels

1.  Get the paper towels wet then squeeze out the excess water.  They should be damp, but not dripping.  Wrap each ear of corn individually in a damp paper towel.  Microwave for 4 minutes.

That's it.  Now go amaze your friends.

Note:  If your corn is not quite ripe or you are microwaving several ears at once, you may need to add additional time.  Stick a fingernail in a kernel, if it is soft and just slightly crisp you are done.  If it is still crunchy-crisp, add some more time.  For example...yesterday I microwaved 5 not-quite-ripe ears at once.  After 4 minutes, they were still fairly crunchy.  I added 3 minutes, and they were not quite there.  1 more minute and they were perfect.


Pin It

Monday, June 10, 2013

Entertaining...The Dinner Party Part IV: Dessert

And now, the finale.  The best for last.  Butterscotch budino (fancy pudding) with caramel sauce, sea salt, and whipped topping.  


If you need to, catch up on Part I (planning) here, Part II (h'ors d'oeuvres) here, and Part III (the main course) here.

This can seem a little scary because there are 3 different parts to make.  But this really is a good choice because, if you read Part I, you will see that you can take an otherwise involved 3-part dessert and break it up over several days so it really doesn't take up too much of your time.  That is my key to being able to pull stuff like this off....especially with kids.  And the pudding really will taste better if you make it the night before.  The flavors really come together after sitting in the fridge a while.

I served this in rocks glasses (I wanted something clear to be able to see the pretty layers), but you can serve it in whatever.  And, this made 6 rather large servings.  I think you could easily do less and make 8 with the same recipe....especially if you have smaller serving dishes.

Another note, some sort of thermometer will make your life easier when making this.  A candy thermometer would be best.  I don't have one, I used my instant read meat thermometer and it worked fine.  If you have nothing, it is ok....you will just have to watch the color very carefully.

And that is the end of this meal. We had fun, and some seriously full stomachs.

What are your favorite tips or things to serve when hosting?


Butterscotch Budino with Caramel and Whipped Cream
Makes 6 large servings

Caramel Sauce
1 cup sugar
1/4 cup light corn syrup
1/4 cup water
1 cup cream
1 tsp vanilla
1/4 tsp salt

1. Place sugar in medium sized heavy-bottomed sauce pan. Add corn syrup and water. Stir gently to mix slightly.  Turn heat to medium and cook sugar without stirring, brushing down the sides of the pan with water if there are any sugar crystals on the sides to prevent burning.  Gently swirl the pan occasionally to promote even cooking.  Allow to cook until a golden amber color, about 10-12 minutes (about 340-350 degrees).  Remove from heat and slowly whisk in cream, butter, vanilla, and salt.  Stir vigorously.  Mixture may seize up, it is ok, just keep stirring and the hard candy will melt into the cream and make a smooth caramel sauce, returning to heat if needed.  Let cool to room temp, then store in fridge in airtight container.  This will keep up to 1 month in the fridge.


Butterscotch Budino
3 cups cream
1 1/2 cups milk
1 whole egg
3 egg yolks
5 TB cornstarch
1 cup plus TB dark brown sugar
1/2 cup water
2 tsp salt (kosher)
5 TB butter
3 TB scotch (or whiskey, bourbon, rum, or nothing, this is optional. But the scotch is great)

1.  Combine sugar and water in heavy-bottomed saucepan, over medium heat, stir until sugar is dissolved.  Continue to cook/boil without stirring (brushing down sides of pan with water if needed) until a dark amber color, about 350-360 degrees.

2.  While sugar is cooking, whisk egg, egg yolks, and cornstarch together in a medium sized bowl.

3.  Once sugar reaches desired color/temp, slowly and carefully stir in the cream and milk, constantly stirring to dissolve all the bits of caramel.  Bring mixture to boil, then very slowly begin adding the hot sugar mix (a little bit at a time) to the egg mixture, whisking constantly to prevent the egg from curdling.  Once about half the caramel mixture has been added to the eggs, slowly begin pouring the egg mixture into to the pan of caramel, continuing to stir constantly until mixture becomes thickened and coats the back of a spoon, about 3-5 minutes.  Remove from heat and push pudding through a fine mesh sieve into a large clean bowl to strain.  Stir in butter until smooth.  Stir in salt and scotch.  

4.  Divide pudding into serving dishes, covering the tops with plastic wrap, pushing the plastic onto the pudding to prevent skin from forming.  Store in the fridge until ready to serve.  Can be made up to 3 days in advance.  This definitely gets better after it sits in the fridge before serving, at least 12 hours.


Whipped Cream Topping
1 cup cold heavy whipping cream
3 TB sugar
1 tsp vanilla
1/4 cup sour cream

1.  Using an electric mixer, whip cream in large bowl until beginning to thicken.  Add sugar and vanilla and continue to beat until soft peaks form.  Gently fold in sour cream until smooth and glossy.  Refridgerate until ready to serve.  Can be made up to 8 hours in advance.

To Serve:
Remove puddings from fridge and allow to sit at room temp for at least 30 minutes.  (I got mine out and topped with caramel just before my friends arrived).  Top with caramel sauce and whipped cream, then add a pinch of Maldonado sea salt (or other flaky salt).


Pin It

Wednesday, June 5, 2013

Entertaining...The Dinner Party Part III: The Main Course

And now, for the main event!


Catch up on Part I (planning) here, and Part II (h'ors d'oeuvres) here.

As I said before, I think it is important to choose a meal that won't keep you glued to the stove the entire night. After all, it is your party and you should be able to enjoy yourself too.

This pasta dish was a no-brainer choice for me. I know I can't shut up about how great it was in the restaurant, but that is because it was in fact that great, and I needed it it my life. Aside from deliciousness, everything can be made ahead of time so there is very little last minute work. And truthfully, the short ribs should be made at least a day ahead because they are better when the flavors have time to meld a little.

This is definitely a time-intensive dish, but if you aren't making your own pasta, it comes together pretty easily. That being said, this isn't something I would recommend for a busy weeknight meal. Save this for a special occasion.

Pappardelle Pasta with Short Rib Ragu and Horseradish Cream
Makes 8 Servings

1 tsp olive oil
4-6 lbs bone-in short ribs
2 onions
8-10 cloves garlic
4 carrots
2 stalks celery
1 28 oz can crushed tomatoes
3 cups beef broth
2 cups red wine
3 tsp fresh thyme
2 tsp fresh oregano
2 bay leaves
salt and pepper

1 cup chicken broth
1 cup heavy cream
1/4 to 1/2 cup grated horseradish (I could only find the jarred, I think fresh would have been better...but prepared worked fine)

Pappardelle Pasta (I used this recipe, you could also just purchase dried pasta)


1. Heat oven to 325. Roughly chop onions, garlic, carrots, celery, thyme, and oregano. Set aside.

2. Heat oil in a large oven-safe pot over medium-high (or regular pot, because you can use your crockpot instead of the oven later). Generously season short ribs with salt and pepper and cook a few at a time until they are browned on all sides. Set browned ribs aside.

3. Remove all but 2 TB fat from pot. Add the carrots, celery, onions, and garlic. Sauté until softened, about 5-7 minutes. Stir in the thyme, oregano, and bay leaves. Cook until fragrant, 2-3 minutes more. Stir in tomatoes, broth, and wine, stirring to scrape up any brown bits. Return ribs to pot, arranging to make sure all are submerged in liquid. Bring to boil, cover, and place in oven. Cook until meat is falling from bone, 3 - 3 1/2 hours.

Note: You can also cook ribs in crockpot instead of the oven. Transfer everything to large slow cooker and cook on low until tender and falling from bone, about 6-8 hours.

4. Let ribs and sauce cool. Remove and discard bay leaves. Remove bones and meat from sauce, set aside. Skim as much fat as possible from the sauce. Then using an immersion blender (or a regular blender or food processor) blend liquid and veggies to make a semi-smooth sauce. Tear ribs into 2-3 inch pieces, discarding bones and any extremely fatty sections. Return meat to sauce, and season with additional salt and pepper if needed. Cover and store in fridge until ready to serve. Can be made up to 3 days ahead of time.

5. To make horseradish cream: stir together cream, chicken broth, and 1/4 cup horseradish (freshly grated or prepared) in a medium saucepan over medium-high heat. Bring to boil and reduce heat to medium-low and continue to simmer until reduced by half, about 20 minutes. Taste and add more horseradish if desired. Set aside until ready to serve. Can be made up to 6 hours ahead of time.

6. To serve: heat short ribs over medium heat. Cook pasta to al dente. Top pasta with short rib ragu and a dollop of horseradish cream.

Note:  If you are making fresh pasta, the dough can be rolled and cut up to 4 hours ahead of time.  Let cut pasta sit at room temp, lightly dust with flour and place in single layers between sheets of waxed paper.  Boil pasta as usual, ~3 minutes.


Pin It

Sunday, June 2, 2013

Meal Plan Monday (on a Sunday) and Some OOTDs

Ok, confession time.  I am making this meal plan now with the intention of shopping tomorrow, but I also have to admit to myself that since B has a bunch of dinners for work this week, meals for us will more than likely end up being things like cereal, toast and yogurt, and scrambled eggs.  Because sometimes it just isn't worth the effort to cook for an audience of 3 year olds.  

True story....when B used to be gone for work and it was just me, I would eat things like Red Vines and root beer for dinner. He makes me be such a grown up.  Ugh......

Anyways, the plan for this week is:

 - Grilled Hoisin Chicken and Pineapple, Sautéed Sugar Snap Peas
 - Homemade Fettuccine Pasta with Low-Fat Alfredo Sauce, Pancetta, and Peas, Salad
 - Grilled Peach Pork Chops, Zucchini, Whole Wheat Couscous
And here are some recent outfits, it definitely seems I have been hung up on stripes lately.  Oy.

I wore this for errands and the kids pre-school graduation celebration.  Fun story...I also wore a less-than-there pair of underwear (to avoid VPL), and while at the school, L decided to jack my dress up to my waist in front of all the pre-schoolers, their parents, and the teachers.  They got an eyeful of ass cheek, and I didn't even get a date...


Next up is this little (big) number....look familiar (↖)?  I wore this for dinner and drinks with a girlfriend.  I love it because it is sooooo comfy.


I sported this for a baby shower, another striped dress. I think I might have a sickness.


And check out these fashion icons....


Pin It