Showing posts with label main dish. Show all posts

Tuesday, December 3, 2013

Oatmeal Chocolate Chip Pancakes


Breakfast is so awesome.  It is the only meal where it is socially acceptable to eat dessert as your meal.  And also, it is the meal where bacon is found the most.  What's not to love?

These pancakes started out as a copy of some pancakes at one of my favorite breakfast spots (that is now closed...sad!).  The original version is actually cranberry oatmeal pancakes with a honey pecan syrup.  They are also are also quite delicious, and I will probably share that version at some point.  But I was feeling the need for something chocolate-ey, since wine is not allowed at breakfast like I do at pretty much any given time of the day.

These are somewhat similar to my Chocolate Chip Cookie Pancakes, although not quite as sweet and cookie-tasting (just in case you were looking to tone down that whole dessert for breakfast plan).

Oatmeal Chocolate Chip Pancakes
Makes ~8 pancakes
170 cal / 5g fat / 28g carbs / 5g protein

1 cup flour
1 cup old fashioned rolled oats
3 TB brown sugar
2 tsp baking powder
1/2 tsp cinnamon
1/2 tsp salt
1 cup milk
1 egg
2 TB melted butter
2 tsp vanilla
1/2 cup chocolate chips

1.  In a food processor, combine flour, 1/2 cup of oats, brown sugar, baking powder, cinnamon, and salt.  Pulse until mixed and oats are powdery.  Place in a large bowl.  Add remaining 1/2 cup oats and stir.

2.  In a separate smaller bowl, beat milk, egg, melted butter, and vanilla until combined.  Add to te dry mixture and stir until just mixed.  

3. Heat a pan or griddle over medium heat, and spray with cooking spray or lightly oil or butter. Pour 1/4 cup batter into circles and sprinkle with chocolate chips.  Cook until edges bubble, then flip pancakes and cook until other side is browned.


Pin It

Monday, November 11, 2013

Roasted Vegetable Stromboli

Don't be scared...stromboli is just a fancy-pants eye-talian word for hot pocket.  Hot Pocket.  There, let that sink in.  Feel better?


Seriously, these things are easy-peasy to make, super yummy, and popular with the kiddos.  And they are a great way to use up some of that homemade pizza dough (in case you are sick of pizza).  If you don't have homemade dough on hand, or just don't feel like making it, it's cool.  Just buy the frozen version or the bag mix (powder, like a cake mix).  But stay away from the stuff in the can...it doesn't stretch as well. 

Making stromboli is super easy, and can be customized to whatever fillings suit your fancy.  In this version, I used a mix of roasted veggies and a little bit of cheese, but seriously, just throw together whatever you like.  I like to serve them with a little marinara on the side for dipping, but again, it's whatever suits you.

Roasted Vegetable Stromboli
Makes 6 servings
212 cals / 8g fat / 23g carbs / 10g protein

1 pizza dough, thawed if frozen (I use this one)
2 heads broccoli (or about 3 cups florets)
2 zucchini
1 red pepper
1 small red onion
1 TB olive oil
1 1/2 tsp salt
1 tsp pepper
1 cup low-fat shredded mozzarella cheese
2 TB grated parmesan

1.  Pre-heat oven to 400.  Dice the red onion, zucchini, and red pepper, cut the broccoli into bite-sized floret pieces.

2.  Toss veggies with olive oil, salt, and pepper.  Lay in a single layer on a large baking sheet and roast until softened and slightly browned, stirring once about half-way through, 30-45 minutes.  Remove from oven and set aside to cool slightly.

3.  Roll dough out on a lightly floured surface into a large rectangle, about 9x15 and about 1/4 inch thick. Spread mozzarella down the center and top with roasted veggies, leaving 2-3 inches of dough on each side.  Close dough up however you want (I tried to do a fancy braid-thing...it didn't turn out so pretty, but pictures are below...you get the idea), pinching any seams to seal, and cutting vents on top if needed.  Sprinkle top with parmesan, transfer to a baking sheet coated with cooking spray or parchment paper and bake until golden brown, about 15-20 minutes.


Pin It

Monday, November 4, 2013

Crock Pot Ham and Beans (and Meal Plan Moday too!)

I've never been especially boastful or cocky, but I don't think I am out of line when I say that I seriously make the best ham and beans ever.  I mean, I always thought they were gross....at least until I gave it a go.  Now I think they are delicious, and so warm and hearty.  And I want to share them with you, because I am so kind and giving (and fine....maybe a liiiiittttle boastful, but whatever).

But first, meal plan Monday is here.  My plan for this week includes:
 - Shrimp and Grits, Roasted Broccoli
 - Healthified Swedish Meatballs, Egg Noodles, Carrots, Cranberries
 - Chicken Tostadas, Black Bean Salad
 - White Bean Ragout, Homemade Ciabatta Toasts, Endive Salad

There are 3 new recipes for me on the menu for this week.  Super exciting stuff, when you don't really do much that is exciting.

Now, back to the ham and beans....a few notes:
  • I have used both navy beans and great white northern beans.  I like the navy beans for the smaller size, but they take longer to cook and aren't as creamy as the northerns.  I would stick with great white northern beans.
  • Some people like to use ham hocks, but I prefer a ham steak (sacrilege, I know), with a smoked neck bone thrown in for flavor.  Smoked neck bones are usually easy to find at the store.  I keep mine in the freezer, and just toss one in the crock pot with the beans.  No need to thaw.
  • These go great with cornbread.  I like to try and keep it low-fat, but I like it all.
  • Do the overnight soak for the beans.  Don't do the quick-soak method.  I don't trust it.
  • I like mine more stew-like than soup-like.  If you want it like soup, just add more broth at the end.
  • Don't be chintzy with the salt.  Seasoning is key.


Crock Pot Ham and Beans
Makes 8 servings
195 cals / 2g fat / 42g carbs / 23g protein

1 lb Great White Northern beans, dry
1 1-lb ham steak, bone-in
1 smoked pork neck bone
2 small onions
4 cloves garlic
2 TB fresh thyme leaves
2 TB brown sugar
2 bay leaves
1/2 tsp nutmeg
1/2 tsp ground cloves
3 cups chicken broth
2 cups water
1/2 tsp salt (or more)
Pepper

1.  The night before you are going to make these, pick through your beans and throw out any super shriveled beans or rocks.  Rinse the beans and place them in a large bowl, covering them with about 6 cups of cold water.  Let the beans sit out and soak overnight, 8-12 hours.

2.  The next morning, drain and rinse the beans.  Place them in your crock pot.  Chop the onion, garlic, and thyme leaves, and add those to the beans.  

3.  Cube the ham steak, removing fat where you can, and add the cubed ham, along with the round bone to the beans.  Add the smoked bone, brown sugar, bay leaves, nutmeg, cloves, broth, water, salt and pepper and stir.  Cook on low for at least 8 hours.  Remove the bones and the bay leaves, season if needed, and serve.

Pin It

Monday, October 28, 2013

No-Fail Homemade Simple Pizza Dough

With "Spooky Pizza Day" (a.k.a. Halloween) quickly approaching, I thought I would share my favorite recipe for homemade pizza dough.  If you haven't tried making your own crust, you really should.  the flavor and the texture is so different from what you can get pre-made.  The dough itself is easy enough to make, but even better is the fact that you can make it ahead of time, and either freeze it for later or keep in the fridge for up to a week.  It makes those last-minute dinners a snap.  Also, I strongly strongly recommend you go with the bread flour (or even 00 if you have it).  The extra gluten is what makes this dough a no-fail one.


The nutritional info is for the entire recipe.

No-Fail Simple Pizza Dough
Makes 2 thinner crust pizzas or 1 thick crust pizza, about 14" each
1015 cals / 13.5g fat / 180g carbs / 32g protein

3/4 cup warm (not hot) water
2 1/2 tsp active dry yeast
1 tsp sugar
2 cups bread flour (plus more for dusting)
1 TB olive oil
1 tsp salt

1.  In the bowl of a stand mixed fitted with a dough hook, combine the water, yeast, and sugar.  Let sit until foamy (about 5-10 mites).  Of just use a regular bowl if you are doing this by hand.

2.  Add the flour, oil, and salt.  Mix until the dough pulls away from the sides and forms a ball.  Turn out onto a lightly floured surface and knead a few times.  Form into a ball and place in an oiled bowl, turning to coat the dough with oil.  Cover with plastic and let the dough rise in a warm place for 1-2 hours, until doubled in size.

3.  Divide dough in half, kneading each half into smooth balls with floured hands.  Roll out to desired thickness, and cook as desired.  Or...cover tightly with plastic wrap and store in the fridge or freeze until ready to use.


Pin It

Wednesday, October 23, 2013

Kale and Sweet Potato Salad(?)


I never know what to call these things...I mean, it is mostly comprised of greens and there is a dressing, so I lean towards salad, but then it is warm and all cooked together...so sauté?  casserole?  Who knows?

Seriously...does anyone know?  Ugh, first-world problems.

 
Anyways, the idea for this dinner was lifted from my Family Circle magazine (yes, I am 80 years old).  I served it as a main dish for a vegetarian night, but it would be good as a side as well.  

And when you get your kale, please buy the bunches...don't get that bag of pre-chopped stuff, it makes it impossible to remove the tough ribs.

Kale and Sweet Potato Salad with Mustard Seed Dressing
Serves 4
200 cals / 5g fat / 39g carbs / 5g protein

1-2 bunches kale (depends on how much greenery you want)
2 sweet potatoes
1 apple
1 red onion
1 TB plus 1/2 tsp olive oil
2 TB mustard seeds
1/4 cup apple cider vinegar
2 TB sugar
salt and pepper to taste 

1. Combine 1 TB olive oil, apple cider vinegar, and sugar in a small saucepan.  Bring to a simmer, add the mustard seeds.  Simmer for 2 minutes, then set aside, allowing to steep for at least 10 minutes.

2.  Peel and chop the sweet potatoes into 1/2 to 1 inch cubes.  Heat 1/2 tsp olive oil in large sauté pan over medium heat, and cook sweet potatoes until softened, about 20 minutes.

3.  While potatoes are coking, remove the stems and center ribs from the kale leaves, tear or chop into bite-sized pieces.  Quarter and thinly slice the red onion.  Chop the apple into 1/2 inch pieces.  When potatoes are almost done (after 15-20 minutes) add the onion and apple, cooking until slightly softened, about 5 minutes.  Then add the kale and cook until softened and beginning to wilt. And sweet potatoes are totally cooked through, about 5 minutes more.  Toss with the prepared dressing and serve warm or at room temp.


Pin It

Wednesday, August 28, 2013

Sweet and Spicy Shrimp, a.k.a. The Best Shrimp You Will Ever Eat

I am a little weird/picky about shrimp.  I mean, I like it, but mostly when it is cold...and a little tougher, you know.....meat-like?  Warm shrimp usually freaks me out texture-wise and so I avoid it.  Except for this dish.

And truth be told, I have never met a soul who doesn't like this shrimp.  Even my pickiest little one (J, of course) will willingly eat this.


It is soooooooo great for a main dish, a side, or as an appetizer at a party.  And quick and easy.  What's not to love?

Sweet and Spicy Shrimp
Makes 6 servings
145 cals / 3g fat / 4g carbs / 24g protein

2 TB olive oil
1/4 cup brown sugar
1 lemon
1/2 cup fresh mint
1-2 tsp cayenne pepper (or to taste, depending on how spicy you like things)
1 tsp salt
1/2 tsp black pepper
2 lbs large shrimp, peeled, deveined, uncooked

1.  In the bowl of a food processor or blender, combine olive oil, brown sugar, zest and juice from one lemon, mint leaves, cayenne pepper, salt, and pepper.  Pulse until blended.  Rinse and dry shrimp and place in shallow dish or ziploc bag with sauce.  Allow to marinate at least 30 minutes, or overnight.

2.  Remove shrimp from marinade and cook over medium-high heat on the grill, about 2-3 minutes per side.  Or, alternatively, cook under high broiler until shrimp is done, about 3 minutes per side.  Serve warm or at room temp.  Garnish with fresh mint, if desired.


Pin It

Sunday, August 25, 2013

Cold Cucumber Soup

Ugh.  I have so many "summertime" recipe ideas to share and I am quickly running out of summer-time to share them.  But this is one I had to bump up to the top of the list.  


I am a big big fan of cold soups, and this one is probably my favorite.  It is full of garden-fresh goodness, takes all of 5 minutes to make, keeps well in the fridge, and is so so perfect for those steamy summer nights. 

Plus, at 30 cals per serving you can totally justify that milkshake you had B run out to get you at 9pm...or something like that.

Are you a cold soup fan?

Cold Cucumber Soup
Makes 8 servings
30 cals / 0g fat / 4g carbs / 3G protein

3-4 cucumbers
4-6 green onions
2 cloves garlic
1/3 cup fresh herbs plus a little extra for garnish, if desired (I like a mix of mint and parsley.  Cilantro, basil, and tarragon also work well)
1/2 lemon
1 cup vegetable broth
1 cup fat-free Greek yogurt
Salt and Pepper
Olive Oil for garnish, optional

1.  Peel and seed cucumbers.  Roughly chop.  Coarsely chop herbs and green parts of onions.

2.  Add chopped cucumber, green onion, chopped herbs, garlic cloves, juice from 1/2 lemon, and broth to blender or food processor and blend until smooth.  Add yogurt and purée until smooth and creamy.  Add salt and pepper to taste, blending to mix.  Refrigerate until cold, at least one hour and up to 3 days.  

Serve cold.  Garnish with extra chopped herbs and a few dots of olive oil, if desired.


Pin It

Wednesday, August 7, 2013

Chicken Schwarma Pitas and the Time I Had to Cut My Pants Off

Once, a long long time ago I was at work.  I was wearing a pair of fitted cropped pants with a hidden side zipper (you know the kind I am talking about?) and had started my day by drinking two large coffees.  So naturally, I had to pee.  I got to the stall and encountered a problem.....my zipper was seriously stuck!  I struggled for a good five minutes trying to get it down, to no avail.  By this time, I reallllly needed to go.  So I ran down the hall to enlist the help of my friends in the lab.  

3 people tried with no success.  One of the men even grabbed a pair of pliers and was trying to get the zipper down (you want akward? Imagine having to pee so bad you have a male co-worker try to wrench your pants off with a pair of pliers).  At this point, I couldn't hold it any longer...it was starting to come out.  I did the only thing I could, I grabbed a pair of scissors, ran to the bathroom, and cut my pants off, emergency room-style.  I had never felt relief so sweet.  

Thankfully one of my friends had her dry cleaning in her car, and just so happened to have a pair of black dress pants in my size (spending the day in dirty pants was much better than spending the day in pants held together with duct tape...thanks Jeri!).

The moral of this story....those hidden side zippers are the worst.  And it never hurts to have a back up pair of pants.  

You know what else?  It never hurts to have yet another simple chicken meal.  I feel like I am going on overkill with these, but we eat a TON of chicken, so variety is great.  I originally got this recipe from one of my lady magazines...but I can't remember which one.  Maybe Woman's Day....maybe Good Housekeeping.  

Either way, these are quick and easy and full of flavor, and they make great lunches the next day.  In the summer I grill the chicken, in the winter I just cook it in a pan with a little cooking spray.  Both ways work just fine. 

Also...look at the nutritional info...go ahead, have 2.  These are incredibly healthy!


Chicken Schwarma Pitas
Makes 8 Servings
190 cals / 4 g fat / 20g carbs / 19g protein

1 - 1 1/2 lb chicken breast, thinly sliced
1/4 cup plus 1/2 cup plain fat-free Greek yogurt
6 cloves garlic
1 lemon
1 tsp cumin
1/2 tsp crushed red pepper
2 tsp salt
1 tsp pepper
1/4 cup tahini
4 whole wheat pita pockets
cucumber, lettuce, tomato, red onion, feta for garnish (all are optional)

1.  Mince garlic.  Trim fat from chicken.

2. Combine 4 cloves minced garlic with 1/4 cup yogurt, zest from 1 lemon, juice from 1/2 lemon, crushed red pepper, cumin, 1 tsp salt, and 1/2 tsp pepper.  Coat chicken in sauce and allow to set at room temp for 20-30 min.

3.  While chicken is marinating....chop/cut any veggies you are using for garnish, make tahini sauce:  mix 1/2 cup yogurt with remaining 2 minced cloves of garlic, juice from remaining lemon half, 1 tsp salt, 1/2 tsp pepper, and tahini.  Mix well and set aside.  Cut pitas in half and warm, if you want.

4.  Cook chicken on grill (or in pan) until cooked through, about 3-4 min per side.  Slice into thin strips, and serve by filling a pita half with chicken, any of the veggies you want, and a good serving of the sauce.


Pin It

Monday, August 5, 2013

Jamaican Grilled Chicken and Plantains

This is one of my all time favorite summer meals, originating from the geniuses at Epicurious.


It is quick, easy, and delicious.  And who doesn't need another simple chicken recipe in their arsenal...right?

Also, my sister-in-law is from Jamaica.  And I made this for her once.  And she liked it...so it is at least a little bit authentic.

Jamaican Grilled Chicken and Plantains
Makes 6 Servings
455 cals / 6g fat / 68g carbs / 28g protein

1/4 cup molasses
1/4 cup red wine vinegar
2 TB tomato paste
1/2 small onion
3 cloves garlic
2 tsp fresh thyme leaves
1/2 tsp cayenne pepper (this will be spicy, add less if you don't want the heat)
1/2 tsp ground allspice
1/2 tsp salt
6 chicken breasts (about 1 1/2 lbs...mine comes with 3 in the pack and I slice them in half horizontally to get 6)
6 large plantains (make sure they are ripe...slightly soft and blackened peels)
1 TB olive oil
salt and pepper

1.  In a blender, combine the molasses, vinegar, tomato paste, onion, garlic, thyme, cayenne, allspice, and salt.  Process until smooth (I like to leave mine a little chunky, but it works both ways).

2.  Trim the chicken breasts, then season both sides with salt and pepper.  Place in a shallow dish and coat with enough sauce to coat.  You should have 1/2 to 1/3 of the sauce left over.  Let chicken sit at room temp to marinate for 20-30 minutes.

3.  Peel and slice the plantains on a diagonal about 1/2 inch thick.  Brush each side lightly with olive oil and season generously with salt and pepper.

4.  Grill chicken and plantains until done.  Chicken will take about 5-8 minutes per side and plantains will take about 3-6 minutes per side.  Serve with extra sauce on the side.


Pin It

Tuesday, July 30, 2013

Orzo Pasta Salad


This is my absolute favorite pasta salad.  I make it All.  The.  Time.  Seriously.  Like, I made it for New Years Eve. Who makes a cold pasta salad in the winter??  this girl. That's who. 

It is pretty basic, but I thought I would share so you too could become an obsessive pasta salad maker like myself.

Welcome to the club.

Orzo Pasta Salad
Makes 12 big servings
225 cals / 6g fat / 36g carbs / 8g protein

1 box orzo pasta (about 16 oz dry)
1/3 cup red wine vinegar
3 TB olive oil
3 TB sugar
1 1/2 tsp salt
1 tsp pepper
1 red onion
6-8 plum tomatoes
1-2 red peppers
1-2 seedless cucumbers
1/3 fresh dill (or mint)
8 oz crumbled reduced-fat feta cheese

1.  Cook pasta to al dente according to directions, then rinse with cold water to cool when done.

2.  While pasta is cooking, finely mince the garlic cloves, then whisk garlic, vinegar, oil, sugar, salt, and pepper together in a large bowl.  

3.  Finely dice the onion (hey...if onion taste bothers you, rinse the diced onion with cold water, it will remove a lot of the onion's power), seed and dice the tomatoes and pepper, dice the cucumbers, and chop the dill.  Toss together with the dressing, cooled pasta, and feta.
Pin It

Thursday, July 11, 2013

Confetti Quinoa

Hi.  I am interrupting my stream of summertime sweets to bring you this delightful salad.  Look at all that colorful delicious goodness.


I got the idea for this one from Pinterest....which is just a wealth of "pinspiration."  Especially for quinoa, which is so hot right now. This recipe comes from Whole Foods, which is another great source of inspiration for me. 

This makes a ton which is great because you can just keep it in your fridge and eat it all week.  Perfect for lunches, side dishes, snacks, or even as a quick meal.  And the great thing about this is you can easily adjust it to leave out things you don't like or swap for things you like.  And there is so much good-for-you stuff in this salad, it just makes sense to make this.


Confetti Quinoa Salad
Makes 12 servings
190 cals / 7g fat / 31g carbs / 6g protein

1 1/2 cups dry quinoa (I mixed red and white, any kind will work)
3 cups water
1 cup shelled edamame beans
1 cup shredded carrots
1/2 cup shredded coconut
1/2 cup dried cranberries
1 red onion
2 mangoes
1 red pepper
1/2 cup cilantro
1/2 cup slivered or sliced toasted almonds
3 limes
1/4 cup white balsamic vinegar
1 TB olive oil
1 1/2 tsp salt
1 tsp pepper

1.  In a large saucepan, bring the quinoa and water to boil over high heat, then cover and reduce heat to medium low.  Cook until water is absorbed and quinoa is done, about 15-20 minutes.  Set aside to cool.

2.  Meanwhile, dice the red onion, red pepper, mango, cilantro, and carrot shreds.   

3.  In a large bowl whisk together juice from the limes, olive oil, vinegar, salt and pepper.  Add the  quinoa, edamame, coconut, cranberries, almonds, onion, red pepper, mango, cilantro, and carrots.  Toss to combine and mix.  Serve chilled.

Pin It

Saturday, June 29, 2013

Simply Amazing One-Pot Pasta


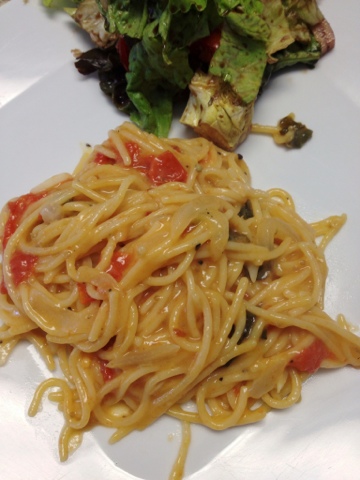
As soon as I saw this recipe in my Martha Stewart magazine, I knew I would be testing it out.  I mean...pasta, cooked in cold water....who ever heard of such a thing??  Insanity.  But just the kind of thing that appeals to my lazy laid-back approach to life.

This dish really is amazing....so simple, quite tasty, and so SO fast.  The starch and the water cook down together to make a creamy sauce, almost like a risotto...but with pasta instead.  Crazy, right?  And even better....I kid you not, this was ready in under 15 minutes from start to finish.  15 minutes and dinner is on the table.  Everybody needs a dish like this in their arsenal.

One-Pot Pasta
Makes 6 servings
290 cals / 5g fat / 44g carbs / 13g protein

14 oz dried spaghetti (one box)
1 pint cherry tomatoes
1 small onion
4 cloves garlic
1/4 cup fresh basil
1 TB olive oil
1/2 tsp crushed red pepper
1 tsp oregano
2 tsp salt
1/4 tsp black pepper
4 1/2 cups water

1. Place dried pasta in a large skillet/pan.  Quarter the tomatoes and add to pan.  Peel and cut the onion in half, then thinly slice, then add to pan.  Thinly slice the garlic and place in pan.  Tear the basil and add to the pasta.  Add the olive oil, red pepper, oregano, pepper, and salt.  Pour the water over the pasta.

2.  Turn the heat to medium-high.  Bring the water to a boil and continue to cook until the liquid is absorbed and pasta is al dente, about 9 minutes.  While the pasta is cooking, use tongs to toss pasta and veggies frequently to distribute everything and make sure it all cooks evenly.  If your heat is too high, the water may cook out before the pasta is done.  Just add a little more and cook until it is ready...I ended up adding about 1/4 cup more water to mine.

And voila....garnish with some parmesan and serve.  That Martha, man....she's a genius.


Pin It

Monday, June 24, 2013

Citrus Grilled Chicken with Citrus Rice Salad

Another day, another picnic-perfect summer meal.


Consider this for summer al fresco dinners, pot lucks, or picnics.  I am including directions for both the chicken and the rice, but you can easily make one without the other.

I made the salad with leftover grains I had in the pantry (quinoa, brown rice, wheat berries), but it would work with anything you have on hand.

As far as meal plans go for this week, I plan on spending lots of time at the pool (hopefully the weather agrees with me), so I don't have much of a meal plan.  We are having teriyaki steaks with sugar snap peas and rice, these Mediterranean Pizzas, and a big batch of this Quinoa Salad, which has quickly become my latest obsession.  I am keeping my summer meal plans laid back, just the way a summer vacation should be.

Citrus Grilled Chicken with Citrus Rice Salad
Makes 8 Servings
280 cals / 3g fat / /34g carbs / 34g protein

1/2 cup orange juice
1 TB olive oil
1/4 cup lemon juice
2 TB white wine vinegar
2 oranges (3 TB orange zest + the orange segments)
2 tsp salt
1 tsp pepper
1 bunch green onions
1 bunch mint, about 1/4 cup chopped
2 lbs chicken breasts
1 cup shredded carrot
1 red pepper
4 cups cooked rice (or any combination of grains)

1.  Trim all the fat and junk off the chicken and place in a large zip loc bag.

2.  Whisk together the orange juice, olive oil, lemon juice, vinegar, orange zest, salt, and pepper.  Thinly slice the green onions.  Add half the onions to the liquid and stir.  Reserve the rest for the rice.  Pour about half the marinade over the chicken, squeeze out any excess air, and seal tightly.  Allow chicken to marinate 2 - 24 hours.  Then grill chicken until done, about 4 minutes per side (may be longer depending on how thick your chicken is).  Thinly slice.

3.  Chop the mint and thinly slice the red pepper.  Cut the peel and pith from the oranges and cur out the segments.  Combine the remaining green onions, mint, orange segments red pepper, carrots, and rice together in a large bowl.  Add the remaining marinade and stir until well mixed.  Serve chicken over the rice salad, warm, at room temp, or cold.


And here it is, all packed up for a picnic at the zoo....

Pin It

Thursday, June 20, 2013

Curried Chicken Quinoa Salad

Mother Nature is being a serious B to those of us here int he Midwest.  Seriously.  It is the middle of June and it was 58 on Tuesday.  Fifty.  Eight.  Meanwhile it is over 80 in Alaska.  Ughhhhh. I never thought I would be jealous of Alaska weather.  This just isn't right.

On the plus side, it is cool enough to enjoy long mornings at the park with the kids, picnics in the afternoon, and evening bike rides.  As long as you have a jacket.  

Soooo, the next couple recipes I have to share is food I consider perfect picnic or potluck food.  In that you can make it ahead of time, and it is good served warm, room temp, or cold.  

This first one is my favorite.  I got the idea for this dish thanks to a couple of quickly ripening mangos in the fruit bowl, a tub of shredded chicken I the fridge I needed to use up, and L's constant request for tikka masala.  The result was deeeeeelicious.  This might be my favorite quinoa concoction ever.  Which is big.  I ate this right after I made it, warm, and loved it.  But then had it again the next day cold and thought it was even better.  The perfect picnic food!

Curried Chicken Quinoa Salad
Makes 8 servings
195 cals / 5g fat / 27g carbs / 9g protein

1 cup dry quinoa (I used a mix of red and white)
2 cups water
1/3 cup lemon juice (about 1 lemon)
1 TB honey
1 TB olive oil
2 tsp curry powder
1 tsp cumin
1 1/2 tsp salt
1 small red onion
1 bunch mint leaves (~1/4 cup chopped)
1 mango
2 cups cooked chicken breast

1.  Combine quinoa and water in saucepan over medium high heat.  Bring to boil, then cover, reduce heat to medium low and continue to simmer until quinoa is done and water is absorbed.  Set aside to cool.

2.  Mince onion and mint.  Dice mango and chicken.  Set aside.  

3.  In a large bowl, whisk together lemon juice, honey, oil, curry powder, cumin, and salt.  Add quinoa, chicken, mango, onion, and mint, tossing to coat.  

Enjoy!


Pin It

Wednesday, June 5, 2013

Entertaining...The Dinner Party Part III: The Main Course

And now, for the main event!


Catch up on Part I (planning) here, and Part II (h'ors d'oeuvres) here.

As I said before, I think it is important to choose a meal that won't keep you glued to the stove the entire night. After all, it is your party and you should be able to enjoy yourself too.

This pasta dish was a no-brainer choice for me. I know I can't shut up about how great it was in the restaurant, but that is because it was in fact that great, and I needed it it my life. Aside from deliciousness, everything can be made ahead of time so there is very little last minute work. And truthfully, the short ribs should be made at least a day ahead because they are better when the flavors have time to meld a little.

This is definitely a time-intensive dish, but if you aren't making your own pasta, it comes together pretty easily. That being said, this isn't something I would recommend for a busy weeknight meal. Save this for a special occasion.

Pappardelle Pasta with Short Rib Ragu and Horseradish Cream
Makes 8 Servings

1 tsp olive oil
4-6 lbs bone-in short ribs
2 onions
8-10 cloves garlic
4 carrots
2 stalks celery
1 28 oz can crushed tomatoes
3 cups beef broth
2 cups red wine
3 tsp fresh thyme
2 tsp fresh oregano
2 bay leaves
salt and pepper

1 cup chicken broth
1 cup heavy cream
1/4 to 1/2 cup grated horseradish (I could only find the jarred, I think fresh would have been better...but prepared worked fine)

Pappardelle Pasta (I used this recipe, you could also just purchase dried pasta)


1. Heat oven to 325. Roughly chop onions, garlic, carrots, celery, thyme, and oregano. Set aside.

2. Heat oil in a large oven-safe pot over medium-high (or regular pot, because you can use your crockpot instead of the oven later). Generously season short ribs with salt and pepper and cook a few at a time until they are browned on all sides. Set browned ribs aside.

3. Remove all but 2 TB fat from pot. Add the carrots, celery, onions, and garlic. Sauté until softened, about 5-7 minutes. Stir in the thyme, oregano, and bay leaves. Cook until fragrant, 2-3 minutes more. Stir in tomatoes, broth, and wine, stirring to scrape up any brown bits. Return ribs to pot, arranging to make sure all are submerged in liquid. Bring to boil, cover, and place in oven. Cook until meat is falling from bone, 3 - 3 1/2 hours.

Note: You can also cook ribs in crockpot instead of the oven. Transfer everything to large slow cooker and cook on low until tender and falling from bone, about 6-8 hours.

4. Let ribs and sauce cool. Remove and discard bay leaves. Remove bones and meat from sauce, set aside. Skim as much fat as possible from the sauce. Then using an immersion blender (or a regular blender or food processor) blend liquid and veggies to make a semi-smooth sauce. Tear ribs into 2-3 inch pieces, discarding bones and any extremely fatty sections. Return meat to sauce, and season with additional salt and pepper if needed. Cover and store in fridge until ready to serve. Can be made up to 3 days ahead of time.

5. To make horseradish cream: stir together cream, chicken broth, and 1/4 cup horseradish (freshly grated or prepared) in a medium saucepan over medium-high heat. Bring to boil and reduce heat to medium-low and continue to simmer until reduced by half, about 20 minutes. Taste and add more horseradish if desired. Set aside until ready to serve. Can be made up to 6 hours ahead of time.

6. To serve: heat short ribs over medium heat. Cook pasta to al dente. Top pasta with short rib ragu and a dollop of horseradish cream.

Note:  If you are making fresh pasta, the dough can be rolled and cut up to 4 hours ahead of time.  Let cut pasta sit at room temp, lightly dust with flour and place in single layers between sheets of waxed paper.  Boil pasta as usual, ~3 minutes.


Pin It

Thursday, May 16, 2013

Crock Pot BBQ Pork Stuffed Sweet Potatoes with Slaw

Once upon a time, long long ago, B and I were on a date. I ordered steak. I think he might have been a little envious of my meal, a little food-possessive, or a little steak-curious. I don't know. But whatever the reason, something possessed him to think it was okay to slowly sneak his fork across the table and pierce one of my freshly cut bites of medium-rare perfection. And what was my reaction? I stabbed his hand. Hard. With my fork. It was an instantaneous reflex. Protect my steak at all costs.

The moral of the story? I take my meat seriously. And also, don't touch my food without asking. I will cut you.

While I wouldn't put BBQ on the same pedestal as steak, it is something I really love to eat. But I don't know how / possess the tools / really care to try to make a proper pulled pork the real way. So pulled pork at home was always just.....mehhhh (pork roast, crock pot, bottle of sauce, and cook, anyone?).

That is until I found this recipe. It totally rocked my crock-pot-pulled-pork world. It is pulled pork perfection. It is still simple enough for non-official BBQ lovers like myself to manage, but tastes authentic. And it smells so so SO good.

I replaced the bun with a healthier (and more filling) baked sweet potato. Top it with some slaw and you have yourself a perfect little dinner.

Slow Cooker BBQ Pulled Pork Stuffed Sweet Potatoes with Slaw
Makes 8 servings
310 cals / 9g fat / 29g carbs / 28g protein

2.5-3 lb lean pork roast (such as loin/sirloin)
2 tsp red wine vinegar
3 tsp hickory liquid smoke
2 tsp garlic powder
1 tsp salt
1/2 tsp pepper
3/4 cup of your favorite BBQ sauce

1 bag shredded cabbage/cole slaw mix
6 green onions
3 TB lite mayo
3 TB white wine vinegar
2 tsp sugar
1 tsp salt

4 large cooked sweet potatoes (I just cook mine in the microwave to save time)

1. Trim all the fat from the pork and place in crock pot. Sprinkle with garlic powder, salt, pepper, vinegar, and liquid smoke. Cook on high for 6-8 hours. Shred pork with 2 forks, stir in BBQ sauce (adjust amount to your preference. I like mine a little drier). Cook an additional 15 min or so.

2. In a large bowl, whisk together mayo, vinegar, sugar, and salt. Thinly slice green onions. Add onions and slaw mix to bowl and toss to coat. Let sit for ~20-30 min before serving.

3. Split baked sweet potatoes in half, top with BBQ pork and slaw, and serve.

Pin It

Wednesday, May 15, 2013

Quick Fix: Tropical Beans and Rice


Can you believe I used to hate beans? All of them. I was crazy I tell you. Crazy!

But I always try and make a point of tasting things I don't like because my tastes change as I get older. Some of the things I used to not eat but now love include: spinach, bleu cheese, asparagus, beans, and lobster. Imagine what I would be missing if I hadn't given these things tries! Right now I am working on fish. Ugh.

This is a quick and easy meatless dinner, and a good way to get your veggies in. And you can easily alter it to your own tastes or what you have on hand. These also make a great side for some grilled chicken or a roast pork.

I serve this over cooked brown rice.

Tropical Beans and Rice
Makes 6 servings
155 cals / 1g fat / 36g carbs / 8g protein

2 cans black beans
1 tsp olive oil
2 mangos
1 small red onion
3 cloves garlic
1 red pepper
1 green pepper
1 jalapeño (optional)
2 tsp apple cider vinegar
2 tsp sugar
1 1/2 tsp cumin
1 1/2 tsp salt
1 tsp pepper

1. Get all the veggies cut first: peel and chop the mangos, dice the red onion, mince the garlic, chop the red and green peppers, remove seeds and stem from jalapeño and mince (if using).

2. Heat oil over medium high heat in a large pot and add the onion. Cook until softened, about 5-7 minutes, then add the green and red pepper, garlic, and jalapeño. Continue to cook until peppers are tender crisp, another 5 minutes or so.

3. Drain and rinse the beans and add to the pot. Stir in mango, vinegar, sugar, cumin, salt, and pepper. Add juice from the limes, and continue to cook until beans are warmed through and starting to smush, about 5-10 minutes. If the beans start to look a little dry, add a bit of water. Adjust the spices. Serve over rice.


Pin It

Thursday, May 9, 2013

Beef With Broccoli Stir-Fry


I adore Chinese food, as does B, but we rarely rarely eat it because a) most of it is incredibly bad for you....loaded with calories and fat, and b) I am a total freak about take-out food, and I think take-out Chinese is the worst....the meats and veggies lose all their crispness and get all smushy and the sauces get all gelatinous and gross, and then temperature is all wrong, and the rice loses its stickiness. Ugh. See.....? Total freak.

My solution to this issue is to make my own. That way I can control the fat content and I don't have to deal with all my texture/temperature issues.

This is a quick and relatively easy dinner, perfect for busy weeknights when you are running short on time. When making stir-fries it is important you get all your ingredients cut and ready to go first, before you start cooking, because it comes together so fast. I served this one over brown rice.

Beef with Broccoli Stir-Fry
Makes 6 servings
210 calories / 7g fat / 14g carbs / 25g protein

1 lb lean beef, such as top sirloin or round
4-5 small bunches broccoli (about 4 cups florets)
1 red pepper
3-4 inch chunk ginger root (2 TB minced)
4 cloves garlic
1 bunch green onions
3 1/2 TB cornstarch, divided
1/4 cup soy sauce
1/2 cup chicken broth
2 tsp rice wine vinegar
2 TB brown sugar
1/2 tsp black pepper
1/4 tsp red pepper flakes
1 tsp sesame (or canola oil)

1. Trim all the fat from the beef and thinly slice it against the grain, as thin as possible. Toss with 1/2 TB cornstarch to coat. Mince the ginger and the garlic. Thinly slice the green onion. Slice the red pepper into thin strips. Cut the broccoli into florets, discard the stems/stalks.

2. In a small bowl, mix 3 TB cornstarch with chicken broth, soy sauce, brown sugar, rice wine vinegar, black pepper, and crushed red pepper flakes until sugar and cornstarch has dissolved.

3. Heat oil in a large frying pan or wok over medium-high heat. Add the garlic and ginger and cook until fragrant, about 1 minute. Stir in the green onions and the beef and cook until beef is browned, about 2-3 minutes. Add the broccoli and red peppers and cook until tender-crisp, about 3 minutes. Stir in the sauce, bringing it to a boil and cooking until the sauce begins to thicken. Serve over rice or noodles.


Pin It

Wednesday, May 8, 2013

The Basics: Fluffy Buttermilk Pancakes


I have a confession: I am a former Aunt Jemima Complete pancake mix addict. I swore by it. Lived for it.  So convenient, so easy, and so so tasty.

That is, until one fateful weekend morning when I discovered my faithful Aunt Jemima was all gone. What to do?!? The kids were clamoring for pancakes. I had to do something. I set aside my fears and my doubts, and I rose to the occasion.  I made pancake batter from scratch.

 I couldn't believe it....not only was it simple (like 2 extra minutes than my trusted mix), they were just as light and fluffy.....and they tasted better.

Since that fateful morning, I have never re-purchased a box of pancake mix. If you, like former me, only use boxed mix, give this a try. It won't disappoint. And you will have one less processed box of food in your life.

This is my standard pancake recipe. I will often add thinly sliced bananas, blueberries, sliced strawberries, or chocolate chips to the poured batter for a little extra morning pizzaz.

Buttermilk Pancakes
Makes 8 Servings
115 cals / 3g fat / 17g carbs / 3g protein

3/4 cup plus 2 TB milk
1 TB vinegar (or just 3/4 cup plus 2 TB buttermilk if you have it)
1 cup flour
3 TB sugar
1 1/2 tsp baking powder
3/4 tsp baking soda
1/2 tsp salt
1 egg
2 TB butter, melted (optional)
2 tsp vanilla

1. Combine milk and vinegar in a small bowl and set aside. In a separate bowl, combine the flour, sugar, baking powder, baking soda, and salt.

2. Add egg, melted butter, and vanilla to the soured milk (or buttermilk), and mix well. Add milk mixture to the flour mixture and stir until combined (some lumps might remain).

3. Heat a pan or griddle over medium heat, and spray with cooking spray or lightly oil or butter. Pour 1/4 cup batter into circles (sprinkle with fruit or add-ins now if you want) and allow to cook until edges bubble, then flip pancakes and cook until other side is browned.


Pin It

Wednesday, April 24, 2013

Back to Basics: Making Pasta

After my gluttony-filled mini vacation to San Francisco, one meal consisting of pappardelle pasta was on my brain (the ultra wide noodles).  But it is impossible to find pappardelle in the store.  And so, I was inspired to try my hand at making my own pasta.

I ordered a cheap pasta roller from amazon (this one).  And did some research.  I consulted with my friend and veteran pasta maker Anne.  And then I consulted the ultimate guide to how I do everything in my life (from how to make pasta to how to apply eyeliner), YouTube.  I found this video to be the most helpful:

http://youtu.be/twG7PCPDPEE


Plus I just love his accent. And his hat.  It makes me feel so authentic.

After several trials, I can now happily relay the following information:
  • Although time consuming, making pasta is actually easy and kind of fun....and therapeutic.
  • It is nearly impossible to screw pasta up.
    • Dough too dry?  Add a little water.
    • Dough too moist?  Add a little flour.
    • Egg Allergy?  Just use water and oil.
    • Don't have semolina flour?  All all-purpose works just great.
  • Homemade pasta is seriously the bomb.  
  • Listening to the classic Italian station on Pandora just helps.
Here is the recipe I like best:

Pasta Dough
Makes 6 large servings
465 cals / 6g fat / 80g carbs / 20g protein

4 cups all purpose flour
1 cup semolina flour
6 eggs
2 tsp olive oil

1.  Make sure your counter is clean and dry.  Mix the flours on the counter and shape into a large bowl/volcano shape (make the sides high enough to contain the eggs).  Crack the eggs into the well in the center.  Add the olive oil.  Using a fork whip the eggs and oil to blend, then slowly start mixing in some flour from the edges until egg mixture is thickened and slightly dough-ey.  If it is too dry and crumbly, add water by teaspoons until slightly moist and uniform.  If dough is too sticky, add more flour.

2.  Using your hands, continue mixing and kneading the dough until uniform.  Knead by hand for 10-15 minutes.  This is going to be tough.  The dough should be stiff, but not crumbly.  Put your back into it.  Break a sweat.  Knead knead knead. Frustrated? Angry? Take it out here.

3.  Wrap the dough in plastic and place in the fridge to rest for 30-60 minutes.  Do not skip this step.  It will help relax the gluten and make the dough nice and smooth and easier to work with.

4.  Remove dough from fridge and cut into 4 parts.  Work with 1 piece of dough at a time (keep the rest covered).  Sprinkle with flour, shape into a rectangle, and run through pasta roller at the widest setting.  Fold into thirds, pat with more flour to prevent sticking, and run through widest setting again.  Repeat 2-3 more times.  Turn dough to next widest setting and roll dough through, switch to next setting, roll dough through, repeating until dough is at desired thickness (I like setting "6").    

5.  Cut or shape dough into desired shapes.  Boil in salted water until done, about 3 minutes, and serve.

If you want to make the pasta ahead of time, you can dust noodles with flour and place in single layers on waxed paper.  These can sit out for 2-4 hours until you are ready to boil them.  It usually takes me ~45 minutes to roll and cut the pasta dough.


Here it is....homemade pappardelle with simple marinara sauce, some fresh basil, and parmesan.


Pin It