Showing posts with label bread. Show all posts

Tuesday, December 10, 2013

Homemade Graham Crackers, Now These are the Real Deal


I feel like my whole life I have been living a lie.  These so-called crackers that come in a box advertising such flavors as "honey" and "cinnamon" are sooooo misleading.  I can't even properly describe the difference.  What I do know is that once you try a homemade graham cracker, you will realize that those things from that box you once thought we're graham crackers are nothing more that cinnamon and sugar sprinkled corrugated cardboard squares.  Seriously.  Your world is about to be turned upside down.  Make these, you will see!

I made these for the kids' snack day back in November.  I found they were plenty sweet, but if you want them extra dessert-y, you can sprinkle them with a mixture of cinnamon and sugar before baking.  Also, to make them fall-themed, I used a leaf cookie cutter.  You can cut them into any shape you want, including just using a knife or pizza cutter to make the traditional squares.

Homemade Graham Crackers
Makes ~24 (but it really depends on what size you cut them to)
105 cals / 4g fat / 17g carbs / 2g protein

1 1/2 cup all purpose flour
1 cup whole wheat flour
1/2 cup dark brown sugar
1 tsp baking soda
1 tsp cinnamon
3/4 tsp salt
1/2 cup cold unsalted butter
1/4 cup honey
1/4 cup plus 1 TB milk (or water)
2 tsp vanilla

1.  Combine the flours, sugar, baking soda, cinnamon, and salt in the bowl of a food processor or mixer.  Cut the butter into small cubes and add to the flour mixture, pulsing until blended in and the mixture resembles coarse corn meal.

2.  In a separate bowl, combine milk, honey, and vanilla. Pour into flour mixture and mix until dough comes together (it will still be very sticky).  Sprinkle wax paper or plastic wrap with flour, and turn dough out onto wrap.  Pat into an even disk using floured hands, wrap up tightly and chill for at least 20 minutes. 

3.  Heat oven to 350.  Line baking sheets with parchment paper.  Remove dough from fridge and roll out onto a really generously floured surface until thin (~1/8 to 1/4 inch thick).  Cut into desired shape, place on prepared baking sheet and prick with a pick or a fork to get the "traditional" holes.  Bake u tip golden, 15-18 minutes.  You can continue to re-roll and cut any of the leftover scrap dough until it is all used up.


Pin It

Tuesday, December 3, 2013

Oatmeal Chocolate Chip Pancakes


Breakfast is so awesome.  It is the only meal where it is socially acceptable to eat dessert as your meal.  And also, it is the meal where bacon is found the most.  What's not to love?

These pancakes started out as a copy of some pancakes at one of my favorite breakfast spots (that is now closed...sad!).  The original version is actually cranberry oatmeal pancakes with a honey pecan syrup.  They are also are also quite delicious, and I will probably share that version at some point.  But I was feeling the need for something chocolate-ey, since wine is not allowed at breakfast like I do at pretty much any given time of the day.

These are somewhat similar to my Chocolate Chip Cookie Pancakes, although not quite as sweet and cookie-tasting (just in case you were looking to tone down that whole dessert for breakfast plan).

Oatmeal Chocolate Chip Pancakes
Makes ~8 pancakes
170 cal / 5g fat / 28g carbs / 5g protein

1 cup flour
1 cup old fashioned rolled oats
3 TB brown sugar
2 tsp baking powder
1/2 tsp cinnamon
1/2 tsp salt
1 cup milk
1 egg
2 TB melted butter
2 tsp vanilla
1/2 cup chocolate chips

1.  In a food processor, combine flour, 1/2 cup of oats, brown sugar, baking powder, cinnamon, and salt.  Pulse until mixed and oats are powdery.  Place in a large bowl.  Add remaining 1/2 cup oats and stir.

2.  In a separate smaller bowl, beat milk, egg, melted butter, and vanilla until combined.  Add to te dry mixture and stir until just mixed.  

3. Heat a pan or griddle over medium heat, and spray with cooking spray or lightly oil or butter. Pour 1/4 cup batter into circles and sprinkle with chocolate chips.  Cook until edges bubble, then flip pancakes and cook until other side is browned.


Pin It

Saturday, November 23, 2013

Biscuits So Good Your Great Grandma Will Be Jealous


I am fortunate to have a history of long-living women in my family.  In fact, my Great Grandma passed away just a few years ago.  It makes me feel like time is on my side, you know?  I am also fortunate that I was able to experience her cooking.  You see, Flora came from a tiny town in the middle-of-nowhere Tennessee.  And as was the case with most southern women, she prided herself on her cooking.  And in her case, that pride was justified.  Her chicken and dumplings and chocolate pies are some best things I have ever eaten, and I have never ever tasted their equals.

Her biscuits were also amazing, but I am proud to say that not only have I equaled them, I am pretty sure I have surpassed them.  That probably has Flora squirming in the grave, but you know what?  She was also kind of a bitch, so....oh well.


A few notes about biscuits...you have 3 options when it comes to fat: butter, shortening, and lard.  All butter...the taste is great, but in my esteemed biscuit opinion, the texture is off. They are too dense and heavy.  All shortening...the texture is perfect, but then the flavor suffers.  My resolution...lard, with a little butter too for the flavor.  If lard freaks you out, sub with shortening, but you really should give it a go.

Also...the less you handle the dough, the fluffier these will be.  After cutting the first time, I will re-form the dough and cut more, but these second-pass biscuits will not be quite as tender as the first.  And skip the third pass....those guys will be worthless.  Or you could just avoid this problem by going rogue and making square biscuits.  Also, make sure everything is really cold, it really does make a difference.

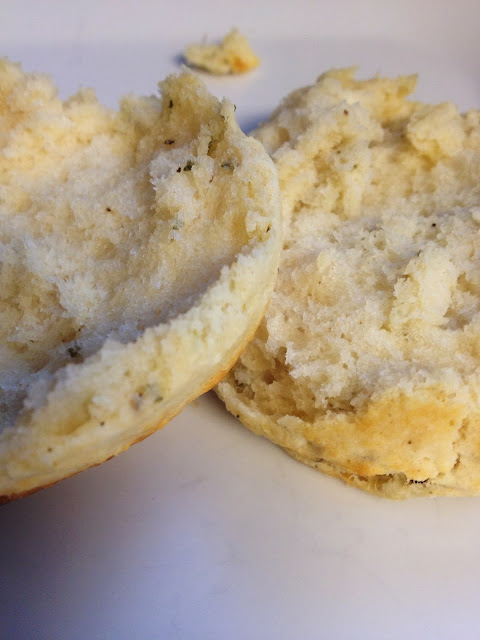
Sometimes I like to add in some flavor crystals, just to kick things up a notch.  In this case I added lots of cracked black pepper and fresh rosemary.  Other ideas are sliced green onions and cheddar cheese, blue cheese, lemon zest and thyme, or just plain old fashioned awesome biscuits.

Better Than Flora's Buttermilk Biscuits

2 cups flour (all-purpose or cake flour)
1 TB baking powder
1/4 tsp baking soda
1 tsp salt
3 TB lard
2 TB I salted butter (plus more to melt and brush on the top)
1 cup cold buttermilk

1.  Heat oven to 450.  Cut butter and lard into small chunks and put them in the freezer to make sure they are really really cold.  Combine the flour, baking powder, baking soda, and salt in a large mixing bowl.  Add butter and shortening, and using a fork and a knife, cut them into the flour until incorporated into the flour and the mixture looks like tiny crumbs or gravel.  Add buttermilk and stir until just combined.

2.  Turn the dough out onto a really well-floured surface and roll until about 1/2 - 1 inches thick, fold the dough in half on top of itself and press/roll it lightly so it sticks together.  This dough is going to be really sticky, so be generous with the flour.  Cut dough into rounds using a floured biscuit cutter or a glass (don't twist the cutter, push is straight down and pull it straight up).  Or use a sharp knife and cut the dough into squares.  Repeat if desired with any excess dough.

3.  Place biscuits onto ungreased baking sheet. Lightly brush the tops with melted butter.  Bake until the tops are golden brown, ~18 minutes.


Pin It

Monday, October 28, 2013

No-Fail Homemade Simple Pizza Dough

With "Spooky Pizza Day" (a.k.a. Halloween) quickly approaching, I thought I would share my favorite recipe for homemade pizza dough.  If you haven't tried making your own crust, you really should.  the flavor and the texture is so different from what you can get pre-made.  The dough itself is easy enough to make, but even better is the fact that you can make it ahead of time, and either freeze it for later or keep in the fridge for up to a week.  It makes those last-minute dinners a snap.  Also, I strongly strongly recommend you go with the bread flour (or even 00 if you have it).  The extra gluten is what makes this dough a no-fail one.


The nutritional info is for the entire recipe.

No-Fail Simple Pizza Dough
Makes 2 thinner crust pizzas or 1 thick crust pizza, about 14" each
1015 cals / 13.5g fat / 180g carbs / 32g protein

3/4 cup warm (not hot) water
2 1/2 tsp active dry yeast
1 tsp sugar
2 cups bread flour (plus more for dusting)
1 TB olive oil
1 tsp salt

1.  In the bowl of a stand mixed fitted with a dough hook, combine the water, yeast, and sugar.  Let sit until foamy (about 5-10 mites).  Of just use a regular bowl if you are doing this by hand.

2.  Add the flour, oil, and salt.  Mix until the dough pulls away from the sides and forms a ball.  Turn out onto a lightly floured surface and knead a few times.  Form into a ball and place in an oiled bowl, turning to coat the dough with oil.  Cover with plastic and let the dough rise in a warm place for 1-2 hours, until doubled in size.

3.  Divide dough in half, kneading each half into smooth balls with floured hands.  Roll out to desired thickness, and cook as desired.  Or...cover tightly with plastic wrap and store in the fridge or freeze until ready to use.


Pin It

Wednesday, May 8, 2013

The Basics: Fluffy Buttermilk Pancakes


I have a confession: I am a former Aunt Jemima Complete pancake mix addict. I swore by it. Lived for it.  So convenient, so easy, and so so tasty.

That is, until one fateful weekend morning when I discovered my faithful Aunt Jemima was all gone. What to do?!? The kids were clamoring for pancakes. I had to do something. I set aside my fears and my doubts, and I rose to the occasion.  I made pancake batter from scratch.

 I couldn't believe it....not only was it simple (like 2 extra minutes than my trusted mix), they were just as light and fluffy.....and they tasted better.

Since that fateful morning, I have never re-purchased a box of pancake mix. If you, like former me, only use boxed mix, give this a try. It won't disappoint. And you will have one less processed box of food in your life.

This is my standard pancake recipe. I will often add thinly sliced bananas, blueberries, sliced strawberries, or chocolate chips to the poured batter for a little extra morning pizzaz.

Buttermilk Pancakes
Makes 8 Servings
115 cals / 3g fat / 17g carbs / 3g protein

3/4 cup plus 2 TB milk
1 TB vinegar (or just 3/4 cup plus 2 TB buttermilk if you have it)
1 cup flour
3 TB sugar
1 1/2 tsp baking powder
3/4 tsp baking soda
1/2 tsp salt
1 egg
2 TB butter, melted (optional)
2 tsp vanilla

1. Combine milk and vinegar in a small bowl and set aside. In a separate bowl, combine the flour, sugar, baking powder, baking soda, and salt.

2. Add egg, melted butter, and vanilla to the soured milk (or buttermilk), and mix well. Add milk mixture to the flour mixture and stir until combined (some lumps might remain).

3. Heat a pan or griddle over medium heat, and spray with cooking spray or lightly oil or butter. Pour 1/4 cup batter into circles (sprinkle with fruit or add-ins now if you want) and allow to cook until edges bubble, then flip pancakes and cook until other side is browned.


Pin It

Thursday, April 18, 2013

Seriously Delicious Wheat Dinner Rolls


I mean it. These are seriously seriously delicious. And easy. And quick too (I mean quick, as far as homemade bread goes). These are done, start to finish, in under two hours. You have to try these. Really, you just have to. They are perfect for holidays, or any time really.

Homemade bread for everyone!

Also, for these I used a mix of whole wheat and all purpose flours. You can use whatever floats your boat.

Also, also, this makes a ton. Halve the recipe if you need to.

Also, also, also, I just discovered the most amazing local Italian deli/grocery. I am in looooove with this place. And my hair and clothes now smell like I have been rolling around in a huge wheel of parmesan. But I don't hate it. I just want some cheese.

I adapted this recipe from King Arthur. Those people are bread geniuses.

Wheat Dinner Rolls
Makes 24 big rolls
145 cals / 2g fat / 26g carbs / 5g protein

1/2 cup warm water
2 cups milk
1/4 cup sugar
1 1/2 TB salt
3 TB active dry yeast
4 cups whole wheat flour
2-3 cups all purpose flour

1. Heat milk, water, and butter together until warm and butter is just melted. Make sure milk is warm to the touch (like a nice warm bath temp) but not scalding hot, and add to the bowl of your stand mixer (or just a large bowl). Stir in the sugar and salt. Sprinkle the yeast over the top and let sit until foamy, about 10 minutes.

2. Add 4 cups whole wheat flour and 1 cup all purpose flour and stir by hand with a spoon until it forms a shaggy/spongey dough. Start mixing with with the dough hook on the mixer (or keep stirring by hand), adding 1/2 cup flour at a time, until dough forms a smooth elasticy ball. Continue to knead with the hook for 4-5 minutes (10-15 min by hand).

3. Spray a large bowl with cooking spray and place dough in bowl. Spray top of dough and cover with plastic wrap. Set in a warm place to rise, 20-25 minutes, until dough is puffy and nearly doubled.

4. Gently punch down the dough and turn out onto a lightly floured surface. Pat into a rectangle and cut horizontally into 4 rows, then vertically into 6 columns to end up with 24 total pieces. Grease a large baking sheet (or 2 smaller sheets or 2 13x9 pans). Roll each piece of dough into a ball and space evenly on the pan. Cover with plastic wrap and let rise for 20-25 minutes.

5. Bake at 350 until golden brown, about 25 minutes.


Pin It

Friday, April 12, 2013

Breakfast Time: Healthier Banana Scones with Chocolate Rum Glaze


It has been a while since I have made scones. Luckily, the forces of the universe aligned, it was a gloomy slow morning, I needed something warm and sweet, and I happened to have a couple bananas sitting on my counter just begging to be used in something besides a smoothie.

These use less butter than my favorite recipe, but still bake up nice and flaky with the crunchy edges that make them so delicious. A few notes for these:
  • I used the same method as these if you need more instructions.
  • I used an equal mix of whole wheat and all purpose flours. You can use any type and ratio of flour you want.
  • These are easily adaptable, so you can sub in Earths Balance and Rice/Soy/Almond milk (for my soy-dairy-free friends).
  • The chocolate on top gives these just that hint of chocolatey awesomeness without impacting calories too much, but you can makes these healthier by skipping it, if you need to. You can also skip the rum if that isn't your thing.
  • You can also make/shape these then freeze them for storage. Bake them straight out of the freezer.
  • The dough is sticky. Don't be scared. Just be really generous with the flour when patting and shaping the dough.

Banana Scones with Chocolate Rum Glaze
Makes 12
145 cals / 4g fat / 22g carbs / 3g protein

3/4 cup milk
1 tsp apple cider vinegar (or lemon juice, or just 3/4 cup buttermilk)
1 cup whole wheat flour
1 cup all purpose flour
1/4 cup brown sugar
2 tsp baking powder
1/4 tsp salt
1/2 tsp cinnamon
4 TB cold cold butter
2 bananas
3 TB semi sweet chocolate chips
1 TB rum

1. Heat oven to 425. Spray a baking sheet with cooking spray and set aside. Mix milk with vinegar and set aside. Cut butter into small chunks. Peel and cut bananas into small chunks (about 1 1/2 - 2 cups).

2. In a large bowl, combine flour, sugar, baking powder, salt, and cinnamon. Use your finger tips to rub the butter into the flour mixture until it resembles a coarse meal (alternatively, you can do this part in a food processor). Add the milk and banana bits and stir until the dough is just barely combined.

3. Turn dough out onto a well-floured surface, and using floured hands, knead 2-3 times to bring it together. Shape and pat the dough into a rectangle, about 1-2 inches thick. Cut dough into 12 equal size pieces (circles, squares, triangles, wedges...whatever suits your fancy). Place on prepared sheet and bake until golden brown, about 25 minutes.

4. While scones are baking, combine rum and chocolate in a small bowl, then begin to heat for 20 second increments at half-power in the microwave, stirring in between increments, until melted and smooth. If your chocolate starts to seize, just add a tiny bit of butter to smooth it out. Drizzle over warm scones (I made a quick cone with waxed paper and piped it on for these). Serve warm.


Pin It

Friday, January 18, 2013

Family Dinner: Curried Coconut Butternut Squash Soup and Oat Bread


You know, there aren't too many meals out there that are better on a cold day than a bowl of soup and some fresh bread, hot out of the oven.

First the soup....your basic squash soup kicked up a notch with the addition of some spices and coconut milk. I adapted this from a WW recipe.

The real star here though, is the bread.  This is the stuff.  It is surprising to me how little "hands-on" time it takes to make your own bread.  If you have some time to kill to let it rise, then you can do this.  (Working folks, this might have to be a Sunday activity for you).

The bread is perfectly dense, and could make some great sandwiches the next day....if you have better self-control than I and can somehow make it last that long. I based this on a recipe from King Arthur Flour, which makes the best flour out there, in my humble opinion.

Curried Coconut Butternut Squash Soup
Makes 8 servings
115 cals / 4g fat / 20g carbs / 2g protein

1 tsp olive oil
2 onions
1 large butternut squash
4 cloves garlic
2 TB grated fresh ginger
1 tsp salt
1 TB curry powder
1/2 tsp garam masala
1/8 tsp cayenne pepper
4 cups chicken broth
1 can light coconut milk
1 lime
cilantro sprigs for garnish

1. Peel and chop onions. Heat oil in a large pot over medium heat and cook onions until soft, about 5 minutes. Meanwhile, mince garlic and grate ginger. Add to pot and continue to cook, stirring occasionally.

2. Remove peel from squash and cut into 1 inch cubes, discarding pulp. Add to onions and continue to cook until squash begins to soften, about 5 minutes more. Stir in curry powder, garam masala, cayenne, and salt. Add chicken broth and bring to a boil. Cover pot and reduce heat to medium low, simmering until squash is soft and mushy, about 20-30 minutes.

3. Using an immersion blender, purée squash until smooth. If you don't have an immersion blender, you can do this in batches in a regular blender or a food processor. Just be careful, cause it is hot! Return soup to pot over medium heat. Stir in the coconut milk and juice from 1 lime. Season with salt and pepper to taste. Garnish with some cilantro sprigs.


Oat Bread

2 tsp (1 packet) active dry yeast
1 1/4 cup milk (I used skim)
3 TB brown sugar
2 TB butter
2 tsp salt
2 cups unbleached bread flour
1 cup whole wheat flour (or you can use all bread flour)
1 cup oats

1. Heat milk to warm to the touch, but not hot (about 45 seconds in the microwave). Mix milk with brown sugar in the bowl of a stand mixer fitted with a dough hook (or just in a large bowl if you are doing this by hand). Sprinkle yeast over the top and let sit until frothy, about 10 minutes. Meanwhile, melt butter.

2. After yeast has become bubbly, add melted butter, salt, flours, and oats. Mix on low speed to kneads until dough forms a ball, then increase speed to medium low and allow dough to knead, about 5 minutes (or knead by hand 10-15 minutes). Dough will become smooth and elastic.

3. Spray a large bowl with cooking spray (or oil), and place dough in bowl, covered in a warm place. Let rise until roughly doubled, about 1 1/2 - 2 hours. Once risen, punch dough down and using your hands, shape into a log shape and place in a well greased loaf pan. Sprinkle with oats for garnish, and lightly cover. Allow dough to rise until about 1 inch above edge of pan, 30-60 minutes. Bake at 350 for 35-40 minutes.


Pin It

Sunday, December 16, 2012

Bake It: Cranberry Orange Scones

This is not a "healthified" recipe. It is, however, a good one. I have a healthier version I will share another day (when I get back on the healthier-only wagon). But these taste better. And it is the holiday season, which means I am reveling in butter and sugar filled glory.

It took several tries for me to get scones right, and now that I have it down, I am passing my findings on to you. Scones are incredibly easy to make once you know the trick, and are awesome hot out of the oven.

Want to know the other awesome thing about scones? They freeze perfectly. I always make the dough then put them straight into the freezer. Once frozen, I keep them in a zip lock bag, then pop them straight from the freezer into the oven whenever I have a hankering. Suckers think I was baking all morning.

This is my favorite flavor combo, but this recipe is easily adaptable to other flavors (blueberry, lemon, chocolate chip, ginger peach, and on and on).

Enjoy!

Cranberry Orange Scones
Makes 12

3 cups plus 2 TB flour
1/3 cup plus 2 TB sugar
3 tsp baking powder
1 tsp salt
1/2 tsp baking soda
2 TB orange zest (from 1-2 oranges)
1 1/2 (3/4 cup) sticks butter, cold
1 cup fresh cranberries
1 cup cold buttermilk (or sub with 1 cup milk mixed with 1 TB apple cider vinegar)
turbinado sugar for topping, if desired

1. Roughly chop the cranberries and toss with the 2 TB flour and the 2 TB sugar. Set aside.

2. Cut your butter into chunks and put onto a plate. You are going to want this really really cold, so what I do is put the plate of butter in the freezer while I do the next steps. Then I take it out right before I am ready to add it.

3. In a food processor fitted with the regular blade, add the flour, sugar, baking powder, salt, baking soda, and orange zest. Pulse briefly to blend. If you don't have a food processor, just do this step in a large bowl.

4. Add the cold butter chunks, and pulse in short spurts until the mixture resembles pea gravel or coarse corn meal. Do not over mix! Place mixture in a large bowl. If you are not using a food processor, then use your fingers to break up the butter pieces and rub the flour into the butter until you get the coarse meal texture. Again, do not over mix or let the butter get too warm. This should not be "doughy" at all. More like coarse flour.

5. Stir in the cranberries. Lastly, add the buttermilk, barely barely barely mixing it in...you seriously barely want to combine this. The less you touch this, the flakier and fluffier your scones will be. Knead once or twice and turn dough out onto a floured surface, using your hands to shape into a rectangle (about 8x10"). Sprinkle the top with turbinado sugar, if desired. Use a knife to cut dough into 12 triangles. At this point you can freeze these and bake them whenever. Or you can go ahead and bake them.

6. Bake on a baking sheet lined with parchment paper or cooking spray at 375 for 25-30 minutes until golden brown. Serve warm.

Pin It

Thursday, December 6, 2012

Family Breakfast: Crunchy French Toast


In my younger days one of my favorite things to do was go out in the city with my friend, Alison, and then stay at her apartment for the night. She lived right next door to one of my most favorite breakfast spots ever, Wishbone. No matter what shape I was in that morning, I made sure to get my act together enough to get my breakfast fix.

I am not going out much these days, but I can still take a walk down memory lane by recreating those breakfast at home (and taking the cals and fat down a notch!).

This french toast is actually what Alison would usually get...I was more of a savory girl. But don't worry, she shared.

Crunchy French Toast
Makes 4 servings
260 cals / 5g fat / 40g carbs / 15g protein

8 slices bread
1 1/2 cup corn flakes (or some cereal like that)
1 1/2 cup skim milk
2 egg
1 egg white
1 tsp cinnamon
1 tsp vanilla
pinch of salt


1. Place cereal in a zip loc bag and crush the flakes into small crumbs. Spread crumbs on a plate.

2. In a medium size bowl, whisk remaining ingredients until well mixed and frothy. Cut each piece of bread in half, diagonally.

3. Heat a skillet over medium high heat and spray generously with cooking spray (or just go ahead and use butter). Soak a piece of bread in egg mixture and then gently press each side into cereal crumbs to coat. Cook each piece of bread in skillet until golden, then re-spray skillet to cook the opposite side, again until golden. About 2-4 min per side. Repeat with remaining bread. Serve with syrup (and bacon).


Pin It

Monday, October 1, 2012

Family Dinner: Beef Barley Soup and Artisan Rosemary Black Pepper Bread

This meal is hearty.  I love making soups in the fall, they are easy, nutritious, healthy, comforting, and filling. (let's see how many adjectives I can fit in there, shall we?)  Beef Barley is a favorite among the tots.  This makes a big pot, so there is plenty of leftovers for lunches throughout the week, or enough to freeze and save for another meal down the road.  It is gets a little thick, so I guess it might be more of a stew than a soup, but you can thin it out to whatever consistency you want using more broth.  The other great thing about this soup is that it is easy to adjust to your tastes.  Want different/more/less vegetables?  Go ahead, switch it up.  It is really almost fool-proof.  I did not take a picture of the soup, I figured soup is something we all kind of know, and frankly, I don't have the photography skills to make it look as good as it tastes.

The bread.  While I wouldn't consider this "healthy," (it is bread after all), it isn't terrible in moderation.  And it tastes amazing, so I think it is worth it.  You can adjust this to your own tastes, adding whatever herbs, cheeses, or flavors you want.  I think the rosemary is a nice complement to the beef soup, though.  Making my own bread is something that I just started attempting this year. It seemed so daunting to me in the past, but it turns out it is actually fairly easy.  The amount of actual effort is minimal, you just have to allow plenty of time to let is rise.  For this recipe, I used my enamel Dutch oven, if you don't have one, I think any oven proof pan with a lid should work.

Beef Barley Soup
Serves 12, about 1 1/2 cup per serving
215 cals/5g fat/27g carbs/23g protein

2 lbs lean beef, such as top round, all the fat trimmed off, cut into bite size pieces
2 cloves garlic, minced
2 lbs carrots, peeled and cut into chunks
1 lb celery, trimmed and cut into chunks
1 medium onion, diced
1 lb green beans, cut into pieces
6 cups 99% fat-free beef broth
4 cups water
1/2 tsp salt
1/2 tsp pepper
2 bay leaves
1 cup uncooked medium pearled barley

Heat a large pot over medium-high heat and spray with cooking spray.  Add beef pieces, and cook until browned, 3-5 minutes.  Add garlic, celery, and carrots, cook an additional 3 minutes.  Add onions and cook until starting to soften, 3-5 minutes.  Add broth, water, salt, pepper, and bay leaves, stirring up any brown bits on the bottom.  Bring to simmer, add green beans and barley, reduce heat to low and allow to simmer ~1-2 hours.

Rosemary Cracked Black Pepper Artisan Bread
Serves 16
165 cals/6g fat/23g carbs/3g protein

1 cup warm water
3 tsp sugar
1 1/2 tsp active dry yeast
2 tsp kosher salt
4 cups all-purpose flour
1 stick melted butter
4 TB chopped fresh rosemary
1 TB fresh cracked black pepper

Add the water and the sugar to the bowl of a stand mixer fitted with a dough hook (you can do this by hand, but it will take you forevvvvvveeeerrrr). Sprinkle the yeast over the top of the water and let it get foamy, about 10 minutes. Add the flour, chopped herbs, salt, pepper, and melted butter. Mix until dough is smooth, stretchy, and pulled into a ball, about 5-6 minutes. Coat a large bowl with nonstick spray, cover with plastic wrap and let rise, 4-6 hours. Lightly knead dough, reshaping into a round loaf shape if necessary, cover, and allow to rise again, 30-60 min. Meanwhile, heat oven to 425. Place empty dutch oven with lid on bottom rack and allow to heat at least 30 min. Take finished dough, plop it into hot Dutch oven, immediately cover with lid and return to oven. Bake for 25 min, removing lid for last 5 min for a browner crust, if preferred.

(Fact: typing Dutch oven this many times has made me giggle like a 13 year-old boy. Maturity at its highest here, folks.)

Pin It