Saturday, November 23, 2013

Biscuits So Good Your Great Grandma Will Be Jealous


I am fortunate to have a history of long-living women in my family.  In fact, my Great Grandma passed away just a few years ago.  It makes me feel like time is on my side, you know?  I am also fortunate that I was able to experience her cooking.  You see, Flora came from a tiny town in the middle-of-nowhere Tennessee.  And as was the case with most southern women, she prided herself on her cooking.  And in her case, that pride was justified.  Her chicken and dumplings and chocolate pies are some best things I have ever eaten, and I have never ever tasted their equals.

Her biscuits were also amazing, but I am proud to say that not only have I equaled them, I am pretty sure I have surpassed them.  That probably has Flora squirming in the grave, but you know what?  She was also kind of a bitch, so....oh well.


A few notes about biscuits...you have 3 options when it comes to fat: butter, shortening, and lard.  All butter...the taste is great, but in my esteemed biscuit opinion, the texture is off. They are too dense and heavy.  All shortening...the texture is perfect, but then the flavor suffers.  My resolution...lard, with a little butter too for the flavor.  If lard freaks you out, sub with shortening, but you really should give it a go.

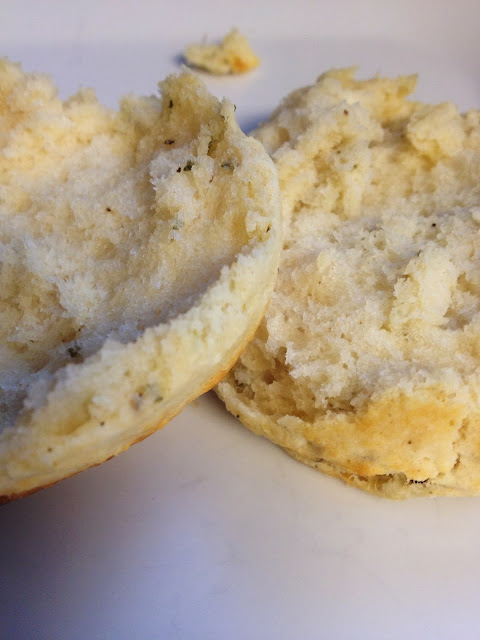
Also...the less you handle the dough, the fluffier these will be.  After cutting the first time, I will re-form the dough and cut more, but these second-pass biscuits will not be quite as tender as the first.  And skip the third pass....those guys will be worthless.  Or you could just avoid this problem by going rogue and making square biscuits.  Also, make sure everything is really cold, it really does make a difference.

Sometimes I like to add in some flavor crystals, just to kick things up a notch.  In this case I added lots of cracked black pepper and fresh rosemary.  Other ideas are sliced green onions and cheddar cheese, blue cheese, lemon zest and thyme, or just plain old fashioned awesome biscuits.

Better Than Flora's Buttermilk Biscuits

2 cups flour (all-purpose or cake flour)
1 TB baking powder
1/4 tsp baking soda
1 tsp salt
3 TB lard
2 TB I salted butter (plus more to melt and brush on the top)
1 cup cold buttermilk

1.  Heat oven to 450.  Cut butter and lard into small chunks and put them in the freezer to make sure they are really really cold.  Combine the flour, baking powder, baking soda, and salt in a large mixing bowl.  Add butter and shortening, and using a fork and a knife, cut them into the flour until incorporated into the flour and the mixture looks like tiny crumbs or gravel.  Add buttermilk and stir until just combined.

2.  Turn the dough out onto a really well-floured surface and roll until about 1/2 - 1 inches thick, fold the dough in half on top of itself and press/roll it lightly so it sticks together.  This dough is going to be really sticky, so be generous with the flour.  Cut dough into rounds using a floured biscuit cutter or a glass (don't twist the cutter, push is straight down and pull it straight up).  Or use a sharp knife and cut the dough into squares.  Repeat if desired with any excess dough.

3.  Place biscuits onto ungreased baking sheet. Lightly brush the tops with melted butter.  Bake until the tops are golden brown, ~18 minutes.


Pin It

Saturday, November 16, 2013

Bake It: Sugar Cookies


Iced sugar cookies are without a doubt my favorite cookie.  Or is it chocolate chip?  Ok...maybe there is a little doubt, but who can hate on a cookie.  Except oatmeal raisin.  Everyone can hate on those, blecchhhh!

Anyways, the kids' school held an ice cream social and bake sale fundraiser for the family of a 5th grade student diagnosed with Ewings-Sarcoma brain cancer.  I wanted to help out (besides of course, eating the ice cream), so I decided to bake up a batch of sugar cookies.  Perfect for the sale, and perfect for the chance to share them with you before the holidays.

The original recipe can be found here.  I don't know who Ella is, but I do know she is a sugar cookie genius.  I love this recipe for so many reasons.  It is simple, it rolls out like a dream, the dough doesn't puff or spread when baking, it doesn't change color, the texture is perfect, and of course they taste great without being too sweet.

Also, you can flavor these however you want.  I prefer almond, so that is what I am listing, but you can sub in all vanilla or lemon or orange zest or extract in its place.

Sugar Cookies
Makes about 30 average-sized cookies
106 cals / 6g fat / 11g carbs / 1g protein

1 cup butter (2 sticks), at room temp
1 cup powdered (confectioners) sugar
1 egg
1 1/2 tsp almond extract
1 tsp vanilla extract
1 tsp salt
2 1/2 cups flour

1.  Cream butter in a large bowl until lightened and fluffy.  Add powdered sugar and cream until well-mixed and fluffy, 2-5 minutes.  Add the egg, almond, and vanillas extracts and mix until well blended.  Add the flour and salt and beat until fully incorporated and dough is smooth looking, but sticky.

2.  Turn dough out onto wax paper and using floured hands, flatten into an even disk.  Wrap in wax paper and refrigerate at least 30 minutes, and up to 1 week.

3.  Heat oven to 375.  Remove dough from fridge (if dough is too cold/stiff let it sit out for 10-15 minutes and try again) and turn out onto a well-floured surface (use lots to prevent sticking), roll dough out to desired thickness (1/4 - 1/2 inch thick) and cut into desired shapes*.  Bake cookies on a greased cookie sheet 8-10 minutes, cookies should not brown.  Cool and decorate with icing,

*You can keep reforming and rolling and cutting the excess dough until you have used as much as you can.


Pin It

Monday, November 11, 2013

Roasted Vegetable Stromboli

Don't be scared...stromboli is just a fancy-pants eye-talian word for hot pocket.  Hot Pocket.  There, let that sink in.  Feel better?


Seriously, these things are easy-peasy to make, super yummy, and popular with the kiddos.  And they are a great way to use up some of that homemade pizza dough (in case you are sick of pizza).  If you don't have homemade dough on hand, or just don't feel like making it, it's cool.  Just buy the frozen version or the bag mix (powder, like a cake mix).  But stay away from the stuff in the can...it doesn't stretch as well. 

Making stromboli is super easy, and can be customized to whatever fillings suit your fancy.  In this version, I used a mix of roasted veggies and a little bit of cheese, but seriously, just throw together whatever you like.  I like to serve them with a little marinara on the side for dipping, but again, it's whatever suits you.

Roasted Vegetable Stromboli
Makes 6 servings
212 cals / 8g fat / 23g carbs / 10g protein

1 pizza dough, thawed if frozen (I use this one)
2 heads broccoli (or about 3 cups florets)
2 zucchini
1 red pepper
1 small red onion
1 TB olive oil
1 1/2 tsp salt
1 tsp pepper
1 cup low-fat shredded mozzarella cheese
2 TB grated parmesan

1.  Pre-heat oven to 400.  Dice the red onion, zucchini, and red pepper, cut the broccoli into bite-sized floret pieces.

2.  Toss veggies with olive oil, salt, and pepper.  Lay in a single layer on a large baking sheet and roast until softened and slightly browned, stirring once about half-way through, 30-45 minutes.  Remove from oven and set aside to cool slightly.

3.  Roll dough out on a lightly floured surface into a large rectangle, about 9x15 and about 1/4 inch thick. Spread mozzarella down the center and top with roasted veggies, leaving 2-3 inches of dough on each side.  Close dough up however you want (I tried to do a fancy braid-thing...it didn't turn out so pretty, but pictures are below...you get the idea), pinching any seams to seal, and cutting vents on top if needed.  Sprinkle top with parmesan, transfer to a baking sheet coated with cooking spray or parchment paper and bake until golden brown, about 15-20 minutes.


Pin It

Monday, November 4, 2013

Crock Pot Ham and Beans (and Meal Plan Moday too!)

I've never been especially boastful or cocky, but I don't think I am out of line when I say that I seriously make the best ham and beans ever.  I mean, I always thought they were gross....at least until I gave it a go.  Now I think they are delicious, and so warm and hearty.  And I want to share them with you, because I am so kind and giving (and fine....maybe a liiiiittttle boastful, but whatever).

But first, meal plan Monday is here.  My plan for this week includes:
 - Shrimp and Grits, Roasted Broccoli
 - Healthified Swedish Meatballs, Egg Noodles, Carrots, Cranberries
 - Chicken Tostadas, Black Bean Salad
 - White Bean Ragout, Homemade Ciabatta Toasts, Endive Salad

There are 3 new recipes for me on the menu for this week.  Super exciting stuff, when you don't really do much that is exciting.

Now, back to the ham and beans....a few notes:
  • I have used both navy beans and great white northern beans.  I like the navy beans for the smaller size, but they take longer to cook and aren't as creamy as the northerns.  I would stick with great white northern beans.
  • Some people like to use ham hocks, but I prefer a ham steak (sacrilege, I know), with a smoked neck bone thrown in for flavor.  Smoked neck bones are usually easy to find at the store.  I keep mine in the freezer, and just toss one in the crock pot with the beans.  No need to thaw.
  • These go great with cornbread.  I like to try and keep it low-fat, but I like it all.
  • Do the overnight soak for the beans.  Don't do the quick-soak method.  I don't trust it.
  • I like mine more stew-like than soup-like.  If you want it like soup, just add more broth at the end.
  • Don't be chintzy with the salt.  Seasoning is key.


Crock Pot Ham and Beans
Makes 8 servings
195 cals / 2g fat / 42g carbs / 23g protein

1 lb Great White Northern beans, dry
1 1-lb ham steak, bone-in
1 smoked pork neck bone
2 small onions
4 cloves garlic
2 TB fresh thyme leaves
2 TB brown sugar
2 bay leaves
1/2 tsp nutmeg
1/2 tsp ground cloves
3 cups chicken broth
2 cups water
1/2 tsp salt (or more)
Pepper

1.  The night before you are going to make these, pick through your beans and throw out any super shriveled beans or rocks.  Rinse the beans and place them in a large bowl, covering them with about 6 cups of cold water.  Let the beans sit out and soak overnight, 8-12 hours.

2.  The next morning, drain and rinse the beans.  Place them in your crock pot.  Chop the onion, garlic, and thyme leaves, and add those to the beans.  

3.  Cube the ham steak, removing fat where you can, and add the cubed ham, along with the round bone to the beans.  Add the smoked bone, brown sugar, bay leaves, nutmeg, cloves, broth, water, salt and pepper and stir.  Cook on low for at least 8 hours.  Remove the bones and the bay leaves, season if needed, and serve.

Pin It